Grounding yourself as a programmer in the AI era, part 5
MP #27: Packaging a project and making it available on PyPI
Note: This is the fifth post in a 6-part series about starting to integrate AI tools into your programming workflow. The previous post showed how helpful an AI assistant can be when doing refactoring work on a small project. The last post in the series draws some conclusions from this overall investigation.
At this point we have a project that’s gone through the exploratory phase, and an initial round of refactoring. It’s ready to be developed further, but it’s also already proven useful for some use cases. This is the kind of tool that’s appropriate to turn into a package, and make available to anyone using Python.1
In this post we’ll add some finishing touches to the project to make it ready to share. We’ll push it to GitHub, so the code is available to everyone. We’ll then push it to a test instance of PyPI, so we can make sure the packaged version is working as intended. Finally we’ll push it to PyPI, where any Python developer can install it with pip.
I won’t be using AI in this post, but I imagine an AI assistant could walk you through this process as well. There are a lot of different approaches to packaging though, so that’s not something I want to rely on an AI assistant for at this point.
Why package a project?
Right now, in order to run this project, you have to use some variation of the following command:
$ python add_border.py image_file.pngYou need to keep track of where the file add_border.py is on your system, even if you make an alias as shown in MP #24. If you move the file, your alias will break, and you’ll have to reconfigure things to keep using the project.
When you turn a project into a package that can be installed with pip, you let Python (through pip) manage the project. The command pip install package_name installs the project to a directory that Python is aware of. You can then run the project using the python -m syntax:
$ python -m add_border image_file.pngWhen you run this command, Python will know where to look for add_border.py. There’s also a configuration option that allows you to use the project without explicitly invoking Python:
$ add-border image_file.pngWith this approach, there’s no need to make an alias. The actual names and commands may vary slightly, depending on how the final package is structured. We’ll see that shortly.
Once a package has been made available through PyPI, any improvements to the project can be pushed to PyPI. New users will get the benefit of those improvements, and current users can run pip install —-upgrade package_name to get those benefits as well.
Preparing the project
There are some changes that need to be made before posting the project to PyPI. For one thing, I went through two separate rounds of refactoring, so I need to choose which changes to keep in the final version of the project. I also need to add a little documentation.
I chose to start with the version of the project from the last post, after using GPT-4 to assist in refactoring. But I made a number of changes that I preferred from my own refactoring work:
- renamed cli_args.py to cli.py, and main.py to add_border.py;
- renamed
ImageOptionArgstoOptions, and pulledpathout ofOptions; - renamed
add_border_to_image()toadd_border(); - added docstrings to each module and function;
- moved some file validation to cli.py;
- updated tests to match the current project structure;
- pushed the project to a separate GitHub repository.
You can see the full project at this point here.
Naming things
When you’re going to package a project, it’s a good idea to sort out some names before getting into the technical work. We need a name for the project; this is the name that people will use when installing it with pip. These names typically use hyphens rather than underscores. I’d like people to be able to use the following command:
$ python -m pip install py-image-borderPrefixing py- to a package name is a common convention. This also serves as a good name for the project’s repository as well.
This project is primarily meant to be used over the command line, rather than imported into a Python file. So, we need a command that people can run when they want to use the project. Hyphens are common here as well. Here’s the usage I’d like to see:
$ add-border image_file.pngThese two names, py-image-border and add-border, are enough to configure the project for packaging.
The Python packaging tutorial
I do a fair bit of maintenance on existing projects, but I rarely build a new package. When I do, I always refer to the latest version of the Python packaging tutorial. I highly recommend skimming the tutorial, and referring to it when you need to create a package.
If you read anything negative about packaging in Python, please keep in mind that Python is a victim of its own success in this area. Python has been in use for three decades, and there are an incredible number and variety of packages in use today. It’s easy to say that a package management system should be simple, but Python’s system needs to address this full range of use cases. It’s a hard problem to solve fully.
The good news is that if you’re working on a new project, you can probably follow the tutorial and make things work. If things don’t work, there’s lots of help available. Just be nice when you ask for help. :)
Restructuring the project
When you’re building an exploratory project, it’s reasonable to have most of your .py files at the top level of the project. When you package a project for distribution, however, it’s helpful to use a different structure. There are more parts in a packaged project, and having the source files in their own directory helps to keep things organized.
Configuration is easier if the name of the source directory matches the name of the project, with hyphens replaced by underscores. For this project, I’ll move add_border.py, cli.py, and image_processing.py to a new directory called py_image_border/.
Here’s the current directory structure:
py-image-border $ tree

├── .gitignore
├── py_image_border/
│   ├── __init__.py
│   ├── add_border.py
│   ├── cli.py
│   └── image_processing.py
└── tests/
    ├── reference_images/
    ├── source_images/
    └── test_basic_functionality.py
You might notice the new .py file __init__.py. This empty file indicates to Python that py_image_border/ is a package. If you omit this file, the project will fail to build.
You can already see an advantage of this structure; the source files are now neatly separated from the tests/ directory. This also means the tests need to be updated slightly, to use the new path to add_border.py.
Modifying imports
With this new directory structure, you need to use the path to add_border.py in order to run the project:
(.venv)$ python py_image_border/add_border.py willie_hiking.jpg
New image saved at willie_hiking_bordered.jpg
However, this will be difficult for end users to run because many users won’t know where add_border.py is saved when it’s installed through pip. We want people to be able to use the python -m syntax, but that doesn’t work at this point:
(.venv)$ python -m py_image_border.add_border willie_hiking.jpg
Traceback (most recent call last):
  ...
  File "/Users/.../add_border.py", line 10, in <module>
    from cli import parse_cli_args
ModuleNotFoundError: No module named 'cli'
The full workflow of Python’s import system is somewhat complex. The short version is that with this directory structure, running as an executable module, Python can’t find the cli.py file when it tries to execute the add_border module.
We can fix this by making a small change to the import statements in add_border.py:
from .cli import parse_cli_args
from .image_processing import add_border
When dealing with file and directory paths, a dot usually refers to the current directory. In this case, we’re telling Python to look for cli.py and image_processing.py in the same directory as add_border.py.
This also affects an import in image_processing.py:
from .cli import OptionsRunning add_border as a module now works:
(.venv)$ python -m py_image_border.add_border willie_hiking.jpg
New image saved at willie_hiking_bordered.jpg
This is great; we’ll be able to tell people they can use the project with the simple command add-border, but if they need to run it with Python, they can use the syntax shown here. They won’t ever have to figure out where pip stored the add_border.py file.
Once again, this requires a small change to the tests, to keep up with how we’re invoking add_border.
Adding a README
People are going to need to know how to use the project. One of the simplest ways to document a project is to add a single README file at the root of the project. There are a variety of formats for README files; I like to use markdown.
You can see the initial draft of the README.md file here. It includes a brief description of the project, and instructions for how to install and use the project. If you’ve never written a README before, here’s a good starting guide.
Adding a license
A license dictates how people can and can’t use your project. Choosing a license is important, because people can’t use your project meaningfully if it doesn’t have a license. For a good overview of how and why to choose a license, see GitHub’s Licensing a repository.
For this project, I’m using the MIT License. This is a permissive license, which is completely appropriate for this project. I don’t care if anyone uses this project in a commercial way, because it would almost certainly be a trivial part of a larger project. Make sure you understand the terms of the license you choose, and aren’t just using what everybody else seems to be using.
Specifying requirements
At this point I specified the requirements for the project:
(.venv)$ pip freeze > requirements.txt
(.venv)$ cat requirements.txt
iniconfig==2.0.0
packaging==23.1
Pillow==9.5.0
pluggy==1.0.0
pytest==7.3.0
End users won’t need all these packages installed, but anyone who wants to contribute to the project and run the tests will need them. We’ll specify the requirements for end users in a moment.
The pyproject.toml file
There have been a number of different ways to specify the configuration of a Python project over the years, but the community has been converging on using pyproject.toml files for a while now.
You can see the full file here, but it will be easier to explain the file in parts:
[build-system]
requires = ["flit_core>=3.4"]
build-backend = "flit_core.buildapi"
The build-system section specifies what tools will be used to package the project. Here I’m using Flit, a newer build system that’s not trying to maintain backwards compatibility with decades of packaging needs.
[project]
name = "py-image-border"
version = "2023.04.14"
authors = [
    { name="Eric Matthes" },
]
description = "Add a border to any image."
readme = "README.md"
requires-python = ">=3.8"
classifiers = [
    "Programming Language :: Python :: 3",
    "License :: OSI Approved :: MIT License",
    "Operating System :: OS Independent",
]
The project section includes general information about the project such as its name, authors, and description.
There are a number of different versioning conventions you can use. Here I’m using calver, a convention based on the calendar. Releases of this project will always be versioned as YYYY.MM.DD, with an additional number if I ever need to make more than one release in a day. I don’t always use this system; if there are any serious backwards-compatibility or stability issues in a project, I prefer semantic versioning conventions.
I haven’t fully tested it yet, but I believe this project should work on Python 3.8 and all subsequent versions. I have no interest in supporting anything older than that, and if there are any issues with 3.8 support I’ll either address them as they come up, or bump the minimum version.
dependencies = [
    "Pillow",
]
The dependencies section focuses on end users. For this project, the only required package is Pillow. Note that pytest is not listed here; that’s only a requirement for people looking to contribute to the project.
[project.urls]
"Homepage" = "https://github.com/ehmatthes/py-image-border"
"Issues" = "https://github.com/ehmatthes/py-image-border/issues"
When the project appears on PyPI, these links will be shown. Anyone who wants to know more about the project will know where to look, and where to report any issues with the project as well.
[project.scripts]
add-border = "py_image_border.add_border:main"
This is the section that defines a shortcut for running the project. This will create a script called add-border. That script will point to the function main(), in the file add_border.py, which is found in the directory py_image_border. This will let people run the project with the following syntax:
$ add-border willie_hiking.jpgFor more about the project.scripts configuration directive, see the Flit documentation.
By the way, this is a good time to reiterate why it was helpful to put the source files into their own directory. Here’s the current project structure:2
$ tree

├── .gitignore
├── LICENSE.txt
├── README.md
├── py_image_border/
│   ├── __init__.py
│   ├── add_border.py
│   ├── cli.py
│   └── image_processing.py
├── pyproject.toml
├── requirements.txt
└── tests/
    ├── reference_images/
    ├── source_images/
    └── test_basic_functionality.py
Without the py_image_border/ directory, the source files would start to get lost among the rest of the package files.
Building the project
The project is set up as a package now, but we’re not quite ready to push it to PyPI. We need all these parts, but end users don’t. When we build the project, we create a version of the project that can be distributed to end users.
First, install the build package:
(.venv)$ pip install buildNow we can build the package:
(.venv)$ python -m build
* Creating venv isolated environment...
...
Successfully built py-image-border-2023.4.14.tar.gz
  and py_image_border-2023.4.14-py3-none-any.whl
This builds two files that PyPI will use for distribution of the package: a zip file, and a Python wheel.
These are both located in a new dist/ directory that build creates:
(.venv)$ ls dist/
py-image-border-2023.4.14.tar.gz
py_image_border-2023.4.14-py3-none-any.whl
We usually ignore these files in .gitignore, because they can be recreated at any time. There’s no need to push them to the GitHub repository.
Using test.pypi
There’s a really helpful test instance of PyPI at test.pypi.org. When I’m setting up a new project, I always push here first. That way I can make sure everything works, before working in the much more public PyPI. If you don’t already have an account on test.pypi, see the section Uploading the distribution archives in the packaging tutorial.
First, install twine:
(.venv)$ pip install twineTwine is used to push projects to PyPI, and the test instance of PyPI.
Here’s the command to push the project to test.pypi:
(.venv)$ python -m twine upload --repository testpypi dist/*
Uploading distributions to https://test.pypi.org/legacy/
Enter your username: __token__
Enter your password:
Uploading py_image_border-2023.4.14-py3-none-any.whl
...
View at:
https://test.pypi.org/project/py-image-border/2023.4.14/
The command uploads everything in dist/ to test.pypi. The command was successful, and you can see the test deployment here.
Testing the deployment
We don’t want to just test the push to PyPI, we want to make sure the installation process works as well. I have a directory on my system called test_code/, which I use to run quick tests. I’m going to make a new empty project there, install the test version of py-image-border, and try using it. If that works, we’ll be ready to push to PyPI.
Here’s the terminal session, in test_code/, where I try out the new package:
$ mkdir try_pib && cd try_pib
$ python -m venv .venv
$ source .venv/bin/activate
(.venv)$ pip install --upgrade pip
(.venv)$ pip install Pillow
Successfully installed Pillow-9.5.0
(.venv)$ pip install -i https://test.pypi.org/simple/ \
    py-image-border==2023.4.14
Successfully installed py-image-border-2023.4.14
I made a new directory, try_pib/. I then made a virtual environment, and installed Pillow. End users won’t need to install Pillow; if they don’t have it, it will be installed for them. When using the test instance of PyPI, however, you need to install any dependencies yourself. Otherwise pip will try to install Pillow from test.pypi, which will most likely fail.
Once Pillow has been installed, the command to install py-image-border from test.pypi works. That’s great!
Now let’s try to run it, after copying an image file into the test project:
(.venv)$ add-border willie_hiking.jpg
New image saved at willie_hiking_bordered.jpg
The project works, using the command add-border.3 It also works when run as a module:
(.venv)$ python -m py_image_border.add_border willie_hiking.jpg
New image saved at willie_hiking_bordered.jpg
Everything works, so we should be all set to push the project to PyPI.
I will be the first to admit this did not all work the first time I ran through the process. I made some deep dives into documentation about the Python import system, and packaging as well.
Pushing to PyPI
The process of pushing to PyPI is actually easier than pushing to test.pypi, because it’s the default target for twine.
I’m working in the py-image-border directory again. Here’s the push:
(.venv)$ python -m twine upload dist/*
...
View at:
https://pypi.org/project/py-image-border/2023.4.14/
The push was successful.
You can test this by making a new empty project and building a virtual environment. In the new environment, the command pip install py-image-border should work:
$ mkdir try_real_pib && cd try_real_pib
$ python -m venv .venv
$ source .venv/bin/activate
(.venv)$ pip install --upgrade pip
(.venv)$ pip install py-image-border
Successfully installed Pillow-9.5.0 py-image-border-2023.4.14
(.venv)$ add-border willie_hiking.jpg
New image saved at willie_hiking_bordered.jpg
Notice this time that we didn’t have to explicitly install Pillow. When we install py-image-border from PyPI, pip sees that Pillow is a dependency. Since it’s not already installed, it installs that first and then installs py-image-border.
It works:
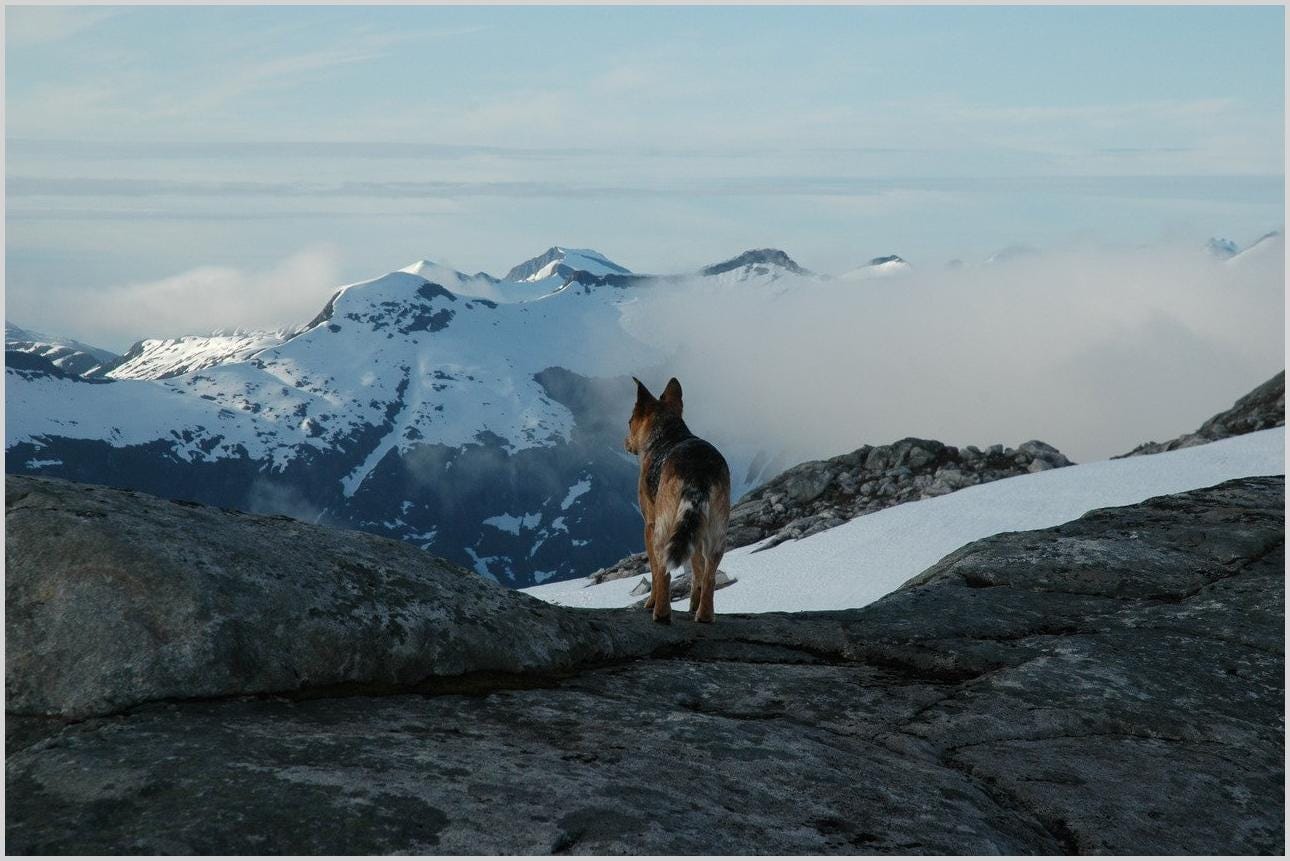
Pushing changes
When you update your project, it’s relatively straightforward to push your changes to PyPI. As a small example, I noticed that the test image doesn’t currently show on the PyPI page. Instead of using a path to the image that only works on GitHub, I’ve updated the README to use an external address that works everywhere. I’ve pushed the changes to GitHub.
Before pushing to PyPI, make sure your tests still pass, and bump the version number in pyproject.toml:
[project]
name = "py-image-border"
version = "2023.04.14.2"
Then delete the dist/ folder, rebuild the project, and upload the new distribution files to PyPI:
(.venv)$ rm -rf dist/
(.venv)$ python -m build
Successfully built py-image-border-2023.4.14.2.tar.gz
  and py_image_border-2023.4.14.2-py3-none-any.whl
(.venv)$ python -m twine upload dist/*
...
View at:
https://pypi.org/project/py-image-border/2023.4.14.2/
The next time someone installs py-image-border, they’ll get this new version. Anyone with an older version can run pip install —-upgrade py-image-border, and they’ll be upgraded to the latest available version as well.
Conclusions
Building a Python package and making it available to everyone is not necessarily easy, but it’s also something that’s perfectly reasonable to try if you’ve got a project that might be useful to others. This project is small, but running it as a CLI tool instead of importing it into a .py file makes it a little more complex than other small projects. If you’ve got a project you want to push to PyPI, you may find that your project is easier to deploy than this one.
You can push Python projects without using all the tools mentioned in this post. For example Flit can be used to build and publish projects. I chose to use separate tools for these steps because build and twine should work regardless of which backend build system you’re using.
I almost always include some documentation about the build process in each project that I deploy to PyPI. I’ll almost certainly step away from this project for some time, and then want to come back to it and push some changes. Even though the deployment process is pretty simple, it’s easy to forget which project used which tools and deployment steps. I added a docs/ directory to this project with a simple README showing how to clone and run the project locally, and how to push changes. This is helpful to me, and anyone else who chooses to help maintain the project. Notice that there are no credentials in these notes; I’ve included the steps, but not the credentials for running the steps.
If you have a project you’ve been thinking of making available through pip, I encourage you to try the process. If you’ve never shared a project before, I hope this post has pulled the curtain back a bit on what it takes to make a project available to the wider Python community.
Resources
You can find the code files from this post in the py-image-border GitHub repository.
This project is useful, but not groundbreaking in any way. It’s not something that could ever be turned into an income-generating project. There’s little reason to keep it private, and a reasonable chance it could prove useful to others.
Think carefully before choosing to open source a project. There’s nothing wrong with trying to build a business around an innovative project. ↩
I’ve shortened the command
treeto emphasize the directory structure. If you just runtree, you won’t see hidden files; if you runtree -a, you’ll see the entire virtual environment structure. Here’s the actual command I used:$ tree -a -L 2 --gitignore -I .git/ -I .pytest_cache -I __pycache__ -FI’ll write a separate post about
tree; it’s a pretty useful tool for examining your project’s structure. ↩If you want to see exactly how
add-borderworks, peek inside your virtual environment:(.venv)$ ls -l .venv/bin ... -rwxr-xr-x 1 eric staff 255 Apr 14 12:46 add-borderA file called add-border, with no extension, was installed to .venv/bin/. Notice the
x’s in the file permissions; this is an executable shell script.Now let’s peek in that file:
(.venv)$ cat .venv/bin/add-border

#!/Users/eric/test_code/try_pib/.venv/bin/python
# -*- coding: utf-8 -*-
import re
import sys
from py_image_border.add_border import main
if __name__ == '__main__':
    sys.argv[0] = re.sub(r'(-script\.pyw|\.exe)?$', '', sys.argv[0])
    sys.exit(main())
This is really a Python file that imports the
main()function from add_border.py, and runs it! ↩