Grounding yourself as a programmer in the AI era, part 2
MP #23: Building a small utility program without AI assistance
Note: This is the second post in a 6-part series about starting to integrate AI tools into your programming workflow. The first post offered a set of guiding questions for thinking about programming in the AI era. The next post refactors this project, without the use of AI tools.
In writing a weekly newsletter, I’ve been working with screenshots a lot more often than I used to. One surprising thing I’ve learned is that there’s no simple way to add a border to screenshots in macOS. You can do it in Preview but it’s difficult to do well, it’s an annoying process, and it’s inefficient. This is a perfect opportunity to use Python to address a small, local workflow issue.
In this post I’ll show how I went from a simple idea to a working solution, without any reference to AI tools. This is the kind of workflow I’ve used all my life as a programmer.
The need for borders
Not all images need borders. But when the background of the screenshot matches the background of the page, the image can get lost on the page. For example, I was writing the colophon for this site and wanted to make a screenshot of an element that occurs on most pages. Without a border, the image blends in with the text:

With a border, the screenshot is appropriately set off from the main text:

To add a border using Preview, you need to make an outline of a rectangular box, and drag the sides of the box to the edge of the image:

This is a slow process, and it’s easy to end up with mismatched borders.
Concept: Adding borders with Python
I’ve worked with the Pillow library before, which lets you use Python to manipulate images. So I know there has to be a way to write a script that would add borders. There are a number of ways to approach this: adding a rectangle to each edge; adding an empty rectangle to the entire image; making a big filled rectangle and then placing the image on top of that. Any of these approaches would be likely to work, and would be fairly straigtforward to do using Pillow.
When I have a good idea that someone else has solved the problem I’m working on, I like to look at other people’s code unless I’m looking for a challenge. I found a gist where someone had implemented a version of one of the approaches I was thinking of. Their script loads the image, expands the image by a set amount, and then fills the expanded region with the border color.
This is a great starting place. I’m confident that if I couldn’t find anything relevant I’d come up with something that works using Pillow, but I’m happy to use the code this person shared as a starting point.
Writing add_border.py
There are some changes I wanted to make to the example code, such as using pathlib to reference the target file, and a little cleaner overall structure. I also want to save the file to disk, without opening a preview window.
This was my first take on add_border.py:
"""Add a border to any image."""
from pathlib import Path
from PIL import Image, ImageOps
# Load the image.
path = Path("willie_mountains.png")
img = Image.open(path)
# Set the border width and color.
border_width = 2
border_color = "darkgray"
# Add the border.
new_img = ImageOps.expand(img, border=border_width,
fill=border_color)
# Save new image.
new_path = Path("willie_mountains_bordered.png")
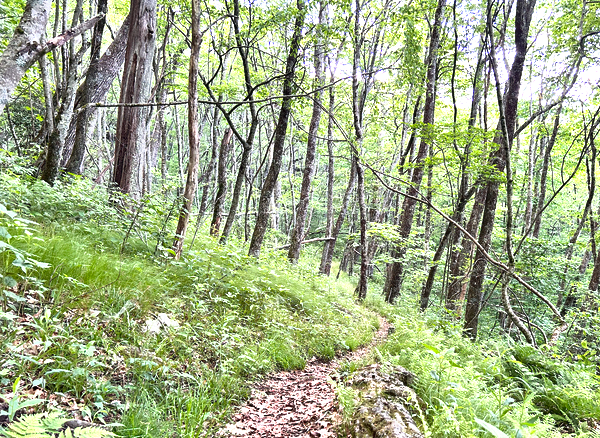
new_img.save(new_path)In writing exploratory code like this, I often hardcode things like the name of the file in a first iteration of the project. I’ll go back and change that to a CLI argument, but it’s nice to know the project works before adding those kinds of details. (I also used a picture from a hiking trip with my dog, which is a little more fun to work with than a boring screenshot.)
If you haven’t used Pillow before, there are a couple helpful things to know. It’s imported as PIL, which is short for Python Imaging Library.1 Most Pillow workflows start with an Image object, typically referred to by a variable called img. Be careful with this object, because if you make changes to it and save it with the same filename, you’ll write over your original image. Be really careful working with images you care about in code. It’s a good idea to always work on a copy of an image you care about during exploratory work.
Here, once we have an img object, we define the border width and color. Then we use the expand() function from the ImageOps module. The Pillow documentation is fantastic; one thing I love about it is the direct links to the source code for functions like expand(). If you’re newer to Python, it can be really helpful to see how high-quality, well-tested Python code is written. And if you’re an experienced Python developer, you can often learn a lot about how a tool can be used by looking at its source code.
The expand() function adds a border around the image that’s been loaded. You can set the size of the border, and the fill argument sets the color of the border. If you’re curious about what colors are available, check out the documentation for the ImageColor module. You can see the list of names in the ImageColor source code, and here’s an excellent SO discussion including a rendering of all the available colors.
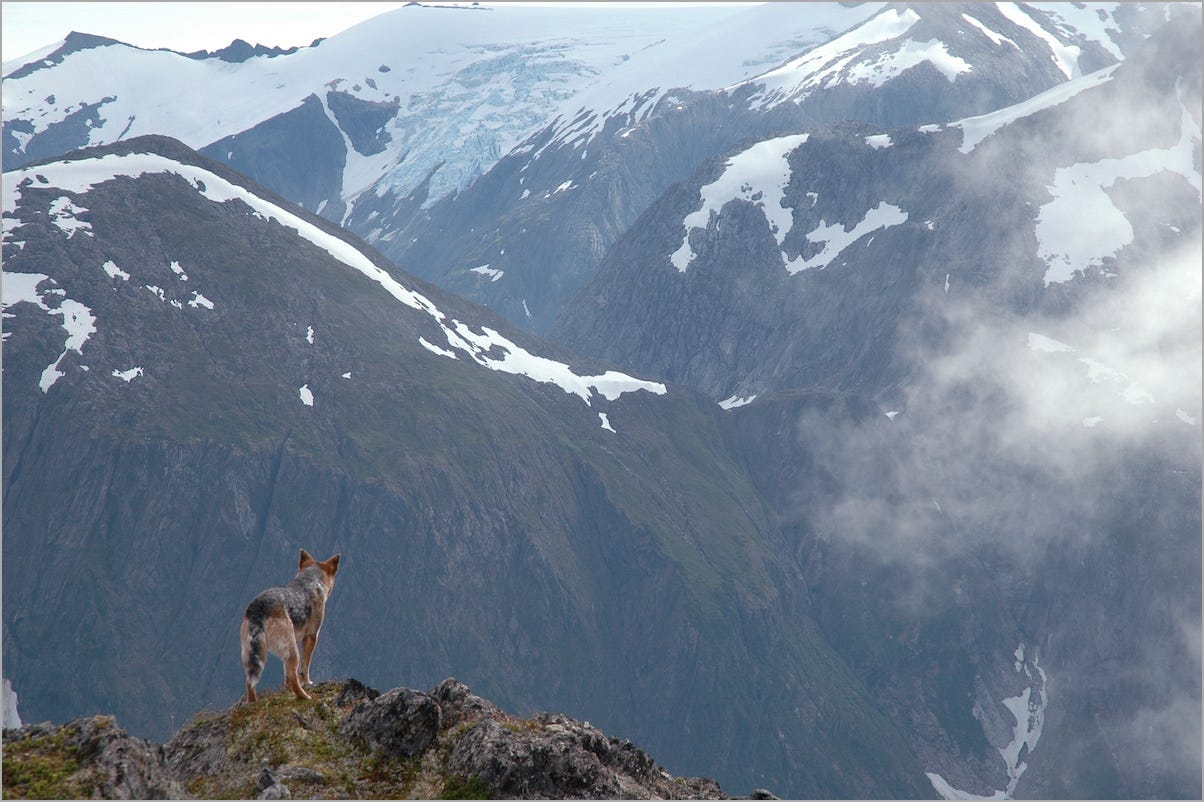
This initial code works:
Now that it works, let’s make the program a little more useful.
Passing a filename
That’s a nice picture of my dog in the mountains, but the program needs to act on different images all the time. We’d like to be able to do something like this:
$ python add_border.py willie_mountains.pngOne of the simplest ways to pass information over the command line is using sys.argv, which is a list of arguments that have been passed to a Python script. The first value is always the name of the file that’s being run, but the rest of the values in the list contain any other information that was passed over the command line.
Here’s a quick demonstration of how sys.argv works:
"""Add a border to any image."""

import sys
from pathlib import Path
from PIL import Image, ImageOps

# Get the filename.
print(sys.argv)

# Load the image.
...
The only thing we’re changing is printing the value of sys.argv, and calling the script from the command line with a filename as an argument.
Here’s the output:
$ python add_border.py willie_mountains.png
['add_border.py', 'willie_mountains.png']
The first item in sys.argv is the script name, and the second item is the filename that we specified. To access the filename inside the script, we’ll use sys.argv[1].
Here’s add_border.py, ready to act on any image on your system:
"""Add a border to any image."""

import sys
from pathlib import Path
from PIL import Image, ImageOps

# Load the image.
path = Path(sys.argv[1])
img = Image.open(path)

# Set the border width and color.
...

# Save new image.
new_path = path.parent / f"{path.stem}_bordered{path.suffix}"
print(new_path)
# new_img.save(new_path)
Instead of a hard-coded path, the value for path is built using sys.argv[1].
When generating the value for new_path, we use some really helpful attributes of Path objects:
path.parent- the path to the file if provided:/Users/.../images/path.stem- the filename, without the file extension:willie_mountainspath.suffix- the file extension:.png
We want to add the string _bordered in the middle of the filename, but we also want to save the file in the same directory as the target file. The value for new_path is built from all of these parts.
Before running something like this, I usually comment out the potentially destructive action, new_img.save(), and make sure the path is what I think it is first. Calling print(new_path) lets us check to see that the correct path is being generated:
$ python add_border.py willie_mountains.png
willie_mountains_bordered.png
$ python add_border.py /Users/.../willie_mountains.png
/Users/.../willie_mountains_bordered.png
This is generating the correct path for the modified file when we pass a relative path from the current directory, and also when we provide a full absolute path. Removing the print() call and uncommenting the new_img.save() call shows that the program still works.
A bit of error checking
While we’re focused on accepting a filename, we can add a quick error check for typos, and anything else that might prevent the image file from loading correctly:
"""Add a border to any image."""

import sys
from pathlib import Path
from PIL import Image, ImageOps

# Get the filename.
try:
    path = Path(sys.argv[1])
except IndexError:
    print("You must provide a target image.")
    sys.exit()

# Load the image.
try:
    img = Image.open(path)
except FileNotFoundError:
    print(f"{path} does not seem to exist.")
    sys.exit()

# Set the border width and color.
...
We first make sure the user actually provided a filename. If they didn’t, sys.argv[1] won’t exist and we’ll get an IndexError. We’ll catch this exception and let the user know they need to supply a filename. If they do specify a filename, we make sure we can open it successfully. If not, we let them know there was an issue finding the file.
When run with a valid image file, the program runs correctly with no output. When called in an invalid way it provides friendly, meaningful error messages:
$ python add_border.py willie_mountains.png
$ python add_border.py
You must provide a target image.
$ python add_border.py willllie_mountains.png
willllie_mountains.png does not seem to exist.
While we’re implementing all this validation, we might as well handle the case where the target file exists, but Pillow can’t open it:
...
from pathlib import Path
from PIL import Image, ImageOps, UnidentifiedImageError

# Get the filename.
...

# Load the image.
try:
    img = Image.open(path)
except FileNotFoundError:
    ...
except UnidentifiedImageError:
    print(f"{path} does not seem to be an image file.")
    sys.exit()

# Set the border width and color.
...
If Pillow can’t open a file, it raises an UnidentifiedImageError.2 Catching this exception lets us generate a friendly error message, instead of showing a full traceback:
$ python add_border.py hello.txt
hello.txt does not seem to be an image file.
The program now responds with clear error messages when called in an invalid way. This isn’t just about serving a wide range of users well. This program is meant to be called from the command line. When I inevitably try to run it through an IDE by accident, where I can’t pass a filename to the script, I’ll get a friendly reminder to run it on the command line.
Custom border sizes
The program is working well, but I noticed quickly that larger images need thicker borders. If you add a 2-pixel border to a large image, it looks much different than a 2-pixel border on a small image when scaled down for use on a variety of displays. So let’s add the ability to pass an optional parameter to change the thickness of the border.
We’ll keep this simple for now and continue to use sys.argv. We’ll make it so you can now run the file like this:
$ python add_border.py willie_mountains.png 15We want this to change the default 2-pixel border to a 15-pixel border:
# Get the filename.
...

# --- Get optional CLI args. ---
try:
    border_width = int(sys.argv[2])
except IndexError:
    border_width = 2

# Load the image.
...

# Set the border color.
border_color = "darkgray"
If a custom border width is included, it will be at index 2 in sys.argv. We need to wrap it with int(), because command line arguments are passed as strings. If a custom border isn’t included, we catch the IndexError and set border_width to the default value of 2. If you’re following along with your own code, make sure you remove the line that set border_width to 2.
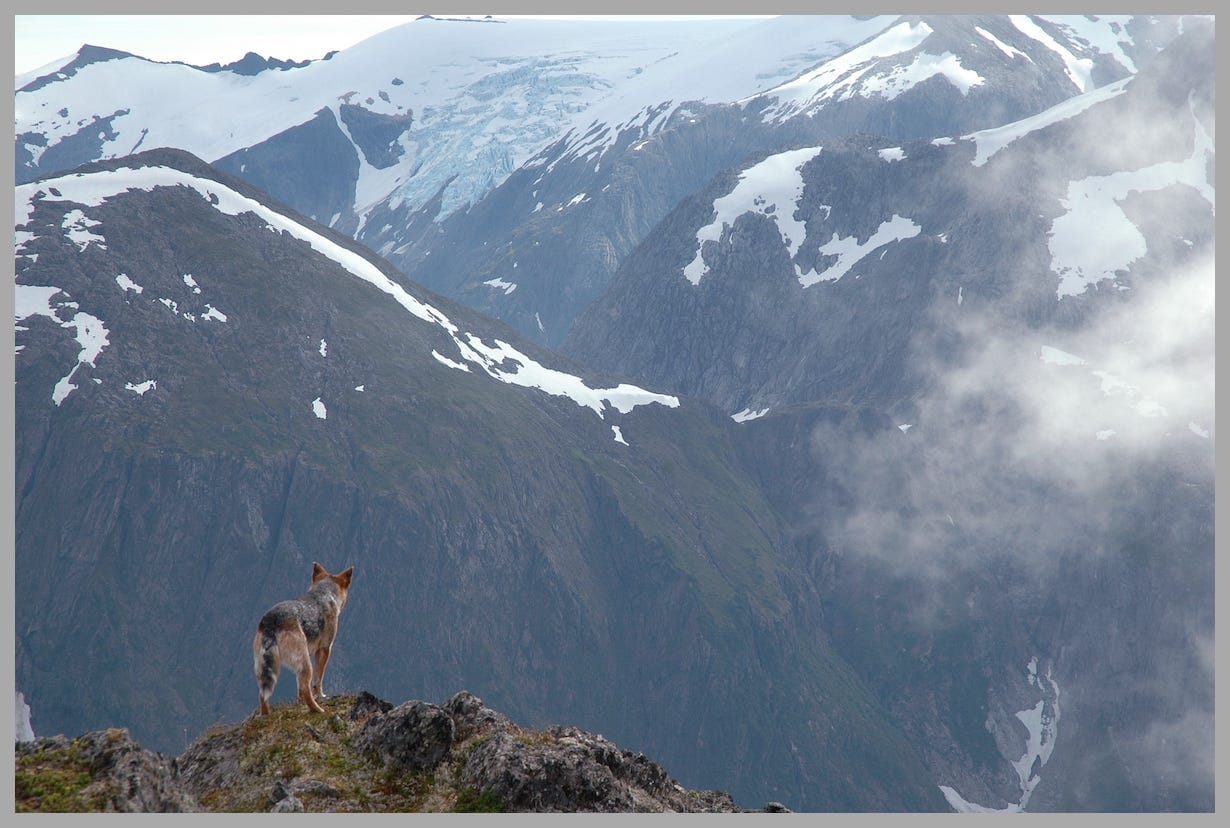
Here’s the output with a custom border width of 15:
I don’t necessarily think the border looks good this thick. I chose a large enough value to make sure the custom border was actually thicker than the default one. If you choose a value close to the default during the development process, it can be hard to know if the new code is actually working correctly.
Allowing padding
I came across one more need in my own work. Sometimes my screenshots have an appropriate amount of whitespace around the content, but sometimes they’re cropped too close. I wanted a way to add some padding between the image content and the border.
Since we’re already adding optional arguments, let’s add one more. The following command will add 20-pixels of padding between the image and the border:
$ python add_border.py willie_mountains.png 15 20Here’s the code:
# --- Get optional CLI args. ---
try:
    border_width = int(sys.argv[2])
    ...

try:
    padding = int(sys.argv[3])
except IndexError:
    padding = 0

# Load the image.
...

# Set the border color.
border_color = "darkgray"

# Add some padding before adding the border.
# The padding is just a white border added before
#   the actual border.
new_img = ImageOps.expand(img, border=padding, fill="white")

# Add the border.
new_img = ImageOps.expand(new_img, border=border_width,
        fill=border_color)

# Save new image.
...
The block that sets the value of padding is just like the block that sets the value of border_width. The default amount of padding is 0.
The code that adds the padding is a good example of a situation where including a comment is quite appropriate. We’re adding padding, but we’re doing it by adding a border. It’s worth explaining this approach, even though someone could probably sort out what’s happening from the code. This is also the kind of comment I’m fairly skeptical of seeing in code produced by an AI tool. That’s one of the things I’m going to be watching for as I start to use AI assistants more regularly.
When adding the border, it’s important to update the call to expand() so it acts on new_img, not img. Otherwise the border would be added to img, which doesn’t have any padding.
This code works:
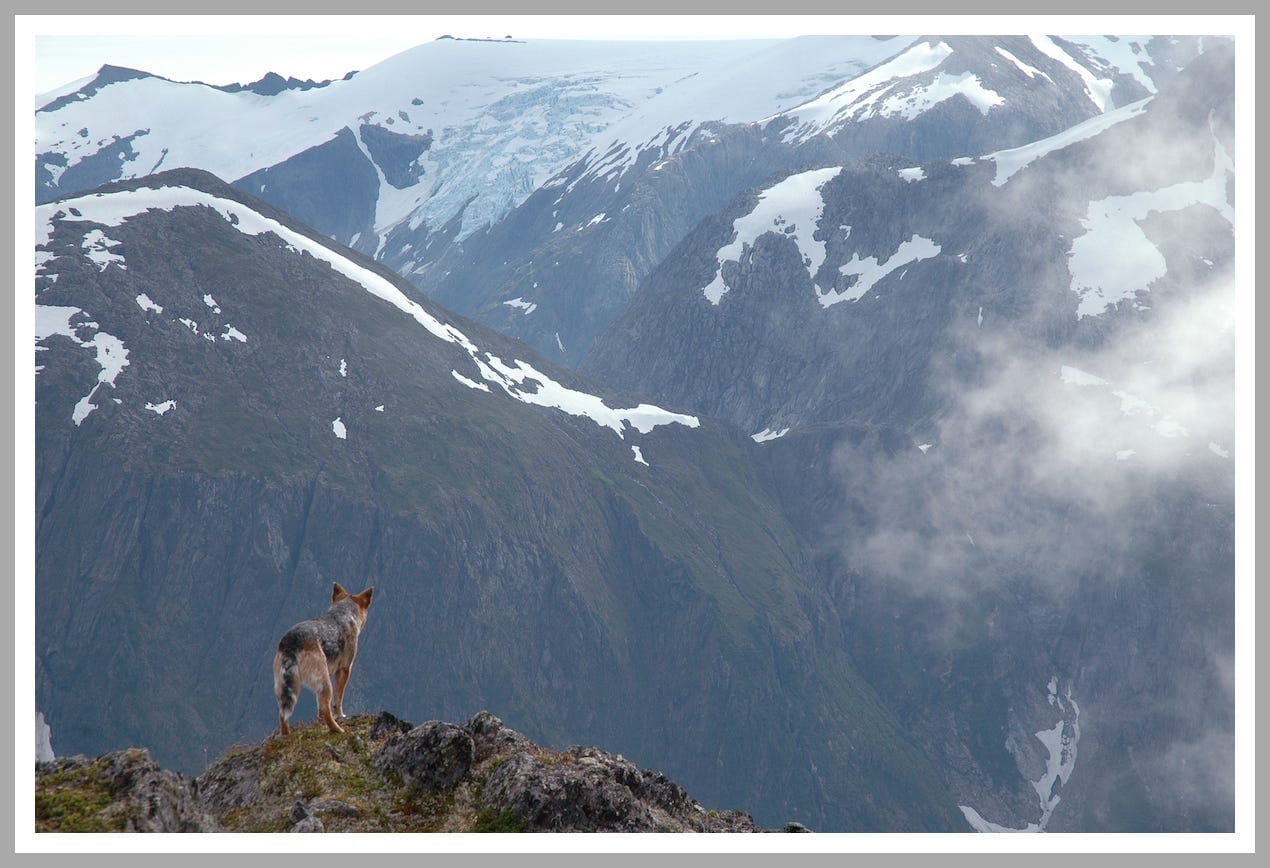
Again, I don’t think the test image looks particularly good like this. But for the screenshots I’m usually working on, this is exactly the effect I’m after.
It’s worth noting that this is not a particularly efficient implementation. We’re making a call to ImageOps.expand() even when the padding is 0. I won’t notice this in my own workflow, because I’m only ever using add_border.py on one image at a time. If we release this as a package, we should really only make that call if the padding is nonzero.3 That way when it’s used to process a batch of images, it will avoid doing unnecessary work on images that don't need padding.
Custom border colors
There’s one last option that would be good to expose over the CLI. Most of my borders for screenshots will end up being light gray, but it would be good to make that an optional CLI argument rather than a hard-coded setting.
This just requires one additional block to the section that gets optional CLI arguments:
# --- Get optional CLI args. ---
...

try:
    border_color = sys.argv[4]
except IndexError:
    border_color = "lightgray"

# Load the image.
...
We also remove the line lower down that hard-codes the value for border_color.
Now the following call works:
$ python add_border.py willie_mountains.png 15 10 black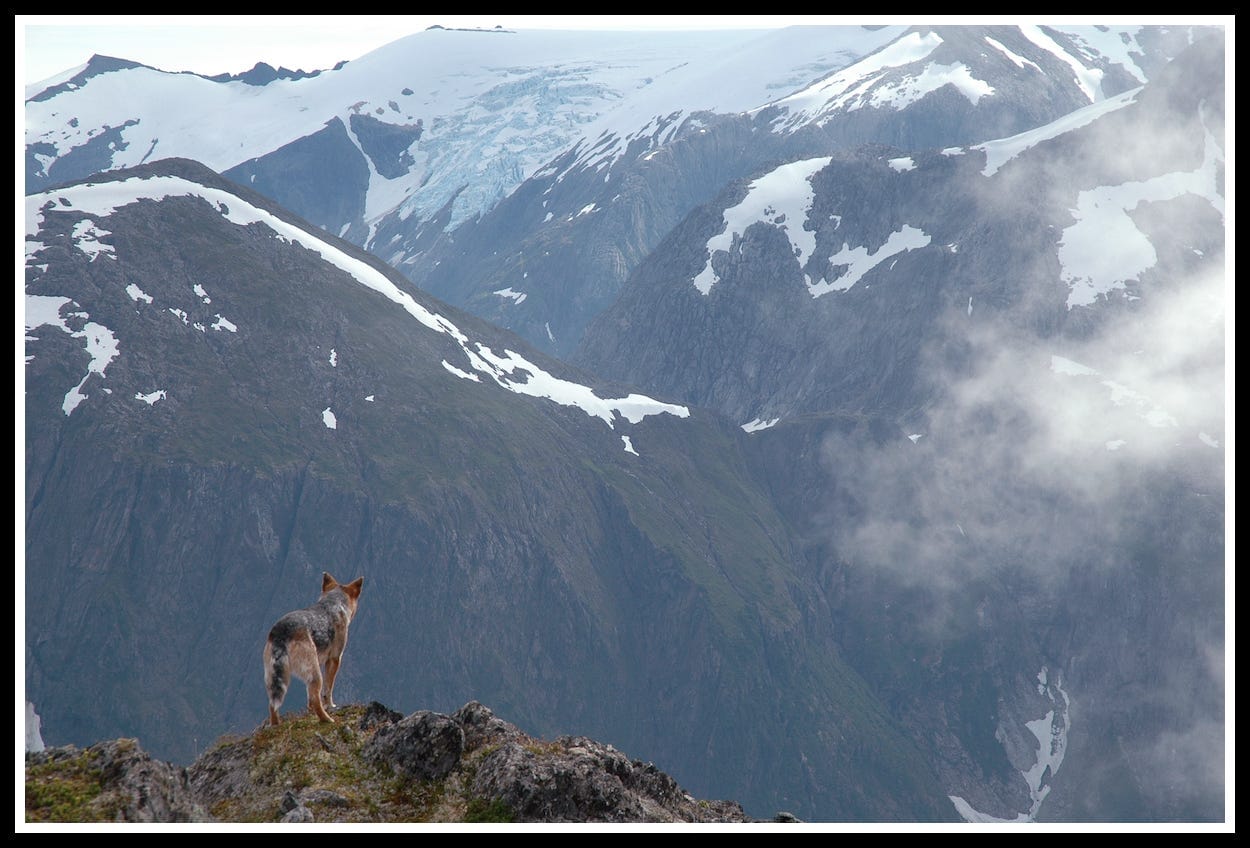
This is not a good design for a final version of the CLI. Because all of the arguments are positional, if you want to set a custom border color you have to include all the other arguments as well. For example if you want a 2-pixel black border with no padding, you need to use the following call:
$ python add_border.py willie_mountains.png 2 0 blackThe following call would fail because black would correspond to sys.argv[2], and the program would try to interpret 'black' as the value for border_width:
$ python add_border.py willie_mountains.png blackWe’ll clean this up in the next post by using the argparse module instead of sys.argv. That will let us keep some arguments as required positional arguments, and convert some to named optional arguments. However, using sys.argv was a simple way to build out the first working version of the program. I’ve been using add_border.py as it’s shown here, and it’s already helped me work more efficiently.
Making an alias
There’s one more step we can take to make the program more useful locally. Right now we have to invoke the python command each time we use add_border.py. So I went ahead and made an alias:
$ alias add_border='python3 /Users/.../add_border.py'
$ add_border willie_mountains.png
An alias is a shortcut for a longer command. Here we’re assigning the alias add_border to the command python3 /full/path/to/add_border.py. Now, in this terminal session, I can navigate to any directory on my filesystem and then use the command add_border:
$ cd any/other/directory
$ add_border any_image_file.png
Most operating systems have a way to save aliases so they’re loaded automatically every time you open a terminal. On my version of macOS, that’s .zprofile. Here are two lines from my .zprofile:
alias gitlog='git log --pretty=oneline'
alias add_border='python3 /Users/.../add_border.py'
I have an alias, gitlog, for calling the single-line version of git log. The point of showing this is to make it clear that you can have as many aliases as you want, ready to use in any terminal session on your system.
This is a nice way to not have to call python, with a full path to the .py file, every time you want to run a custom utility script on your system.4
Conclusions
This is a pretty accurate representation of one approach I take to building a small utility for personal use. This was exploratory code, but it already does a nice job of solving an annoying issue I’ve been dealing with recently.
The ability to easily add borders to screenshots isn’t groundbreaking, but I think it might be useful to others. In the next post we’ll refactor this code and clean up the CLI. Then we’ll have an AI assistant clean up the code starting from the same initial state, and we’ll see how the two versions (and workflows) compare.
Resources
You can find the code files from this post in the mostly_python GitHub repository.
If you don’t have Pillow installed, you can install it with your variation of
pip install Pillow. For more specific installation instructions, see Pillow’s installation docs. ↩You might be tempted to read documentation or blog posts or ask an AI what Pillow does if it can’t open a file. But a nice shortcut, if you haven’t done this before, is to just make an invalid file. I made a one-line file called hello.txt, and passed the name of that file when running add_border.py. That generated a traceback, which showed the specific exception Pillow raises in this situation:
$ python add_border.py hello.txt
Traceback (most recent call last):
  File "add_border.py", line 16, in <module>
    img = Image.open(path)
          ^^^^^^^^^^^^^^^^
  File "/.../PIL/Image.py", line 3283, in open
    raise UnidentifiedImageError(msg)
PIL.UnidentifiedImageError: cannot identify image file
'/Users/.../hello.txt'
If this is a standard Python exception, you can simply catch it in an
exceptblock. If it’s a custom exception, you need to import the exception and then you can catch it in anexceptblock. ↩The padding can be negative; this makes
expand()act as a cropping function. ↩This only works if Pillow is installed globally. I use virtual environments for most projects, but I have a small number of libraries, including Pillow, installed globally. These libraries make it easier to write exploratory code without activating a virtual environment, and to run utility scripts like this. ↩