Django from first principles, part 8

MP 99: Styling the blogs page, and collecting static files into one directory.
Note: This is the eighth post in a series about building a full Django project, starting with a single file. This series will be free to everyone, as soon as each post comes out.
In the last post we used a micro CSS framework to add some basic styling to the home page. In this post we'll add some minimal styling to the page showing all the blogs that have been created so far. After that we'll look at how Django manages all the static files for a project, both for local projects and remote deployments.
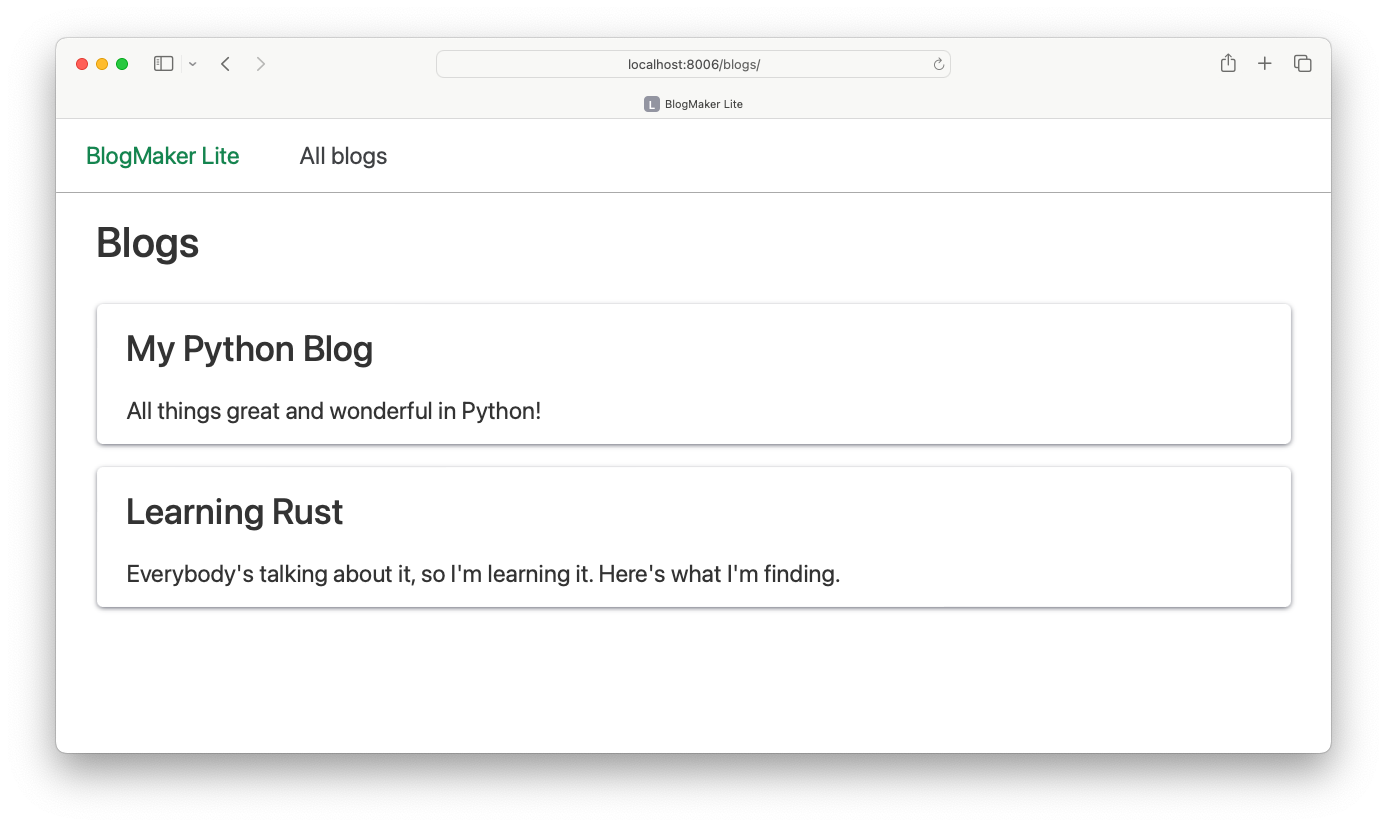
The blogs page
Here's what the blogs page looks like currently:
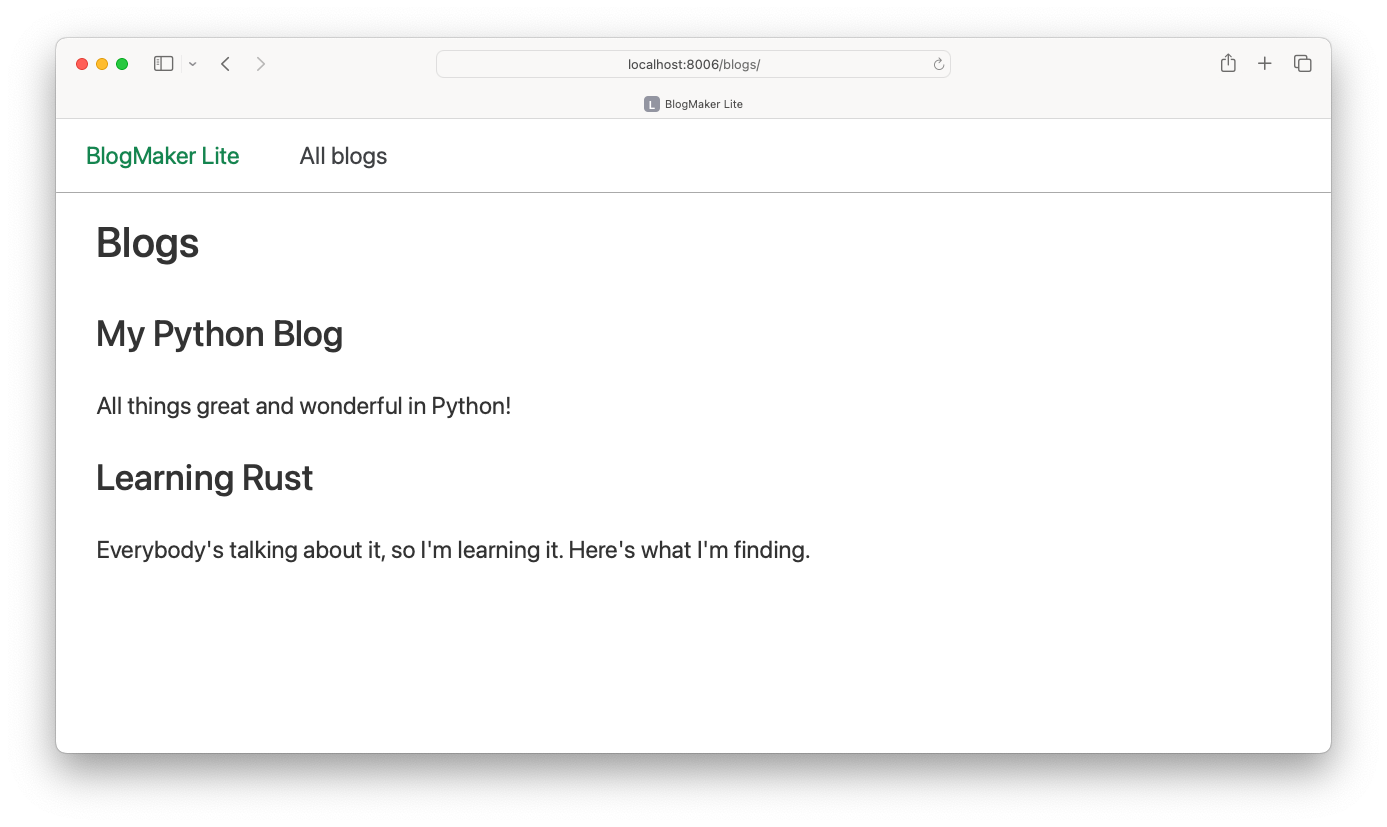
This page already looks better because of the work we did on the home page. It has the same navigation bar as the home page, and the default styling for the headings and body text is better as well.
Making a sketch
I almost always work from a sketch when trying to figure out basic styling for a page. Here's my one-minute sketch of what I'd like this page to look like:
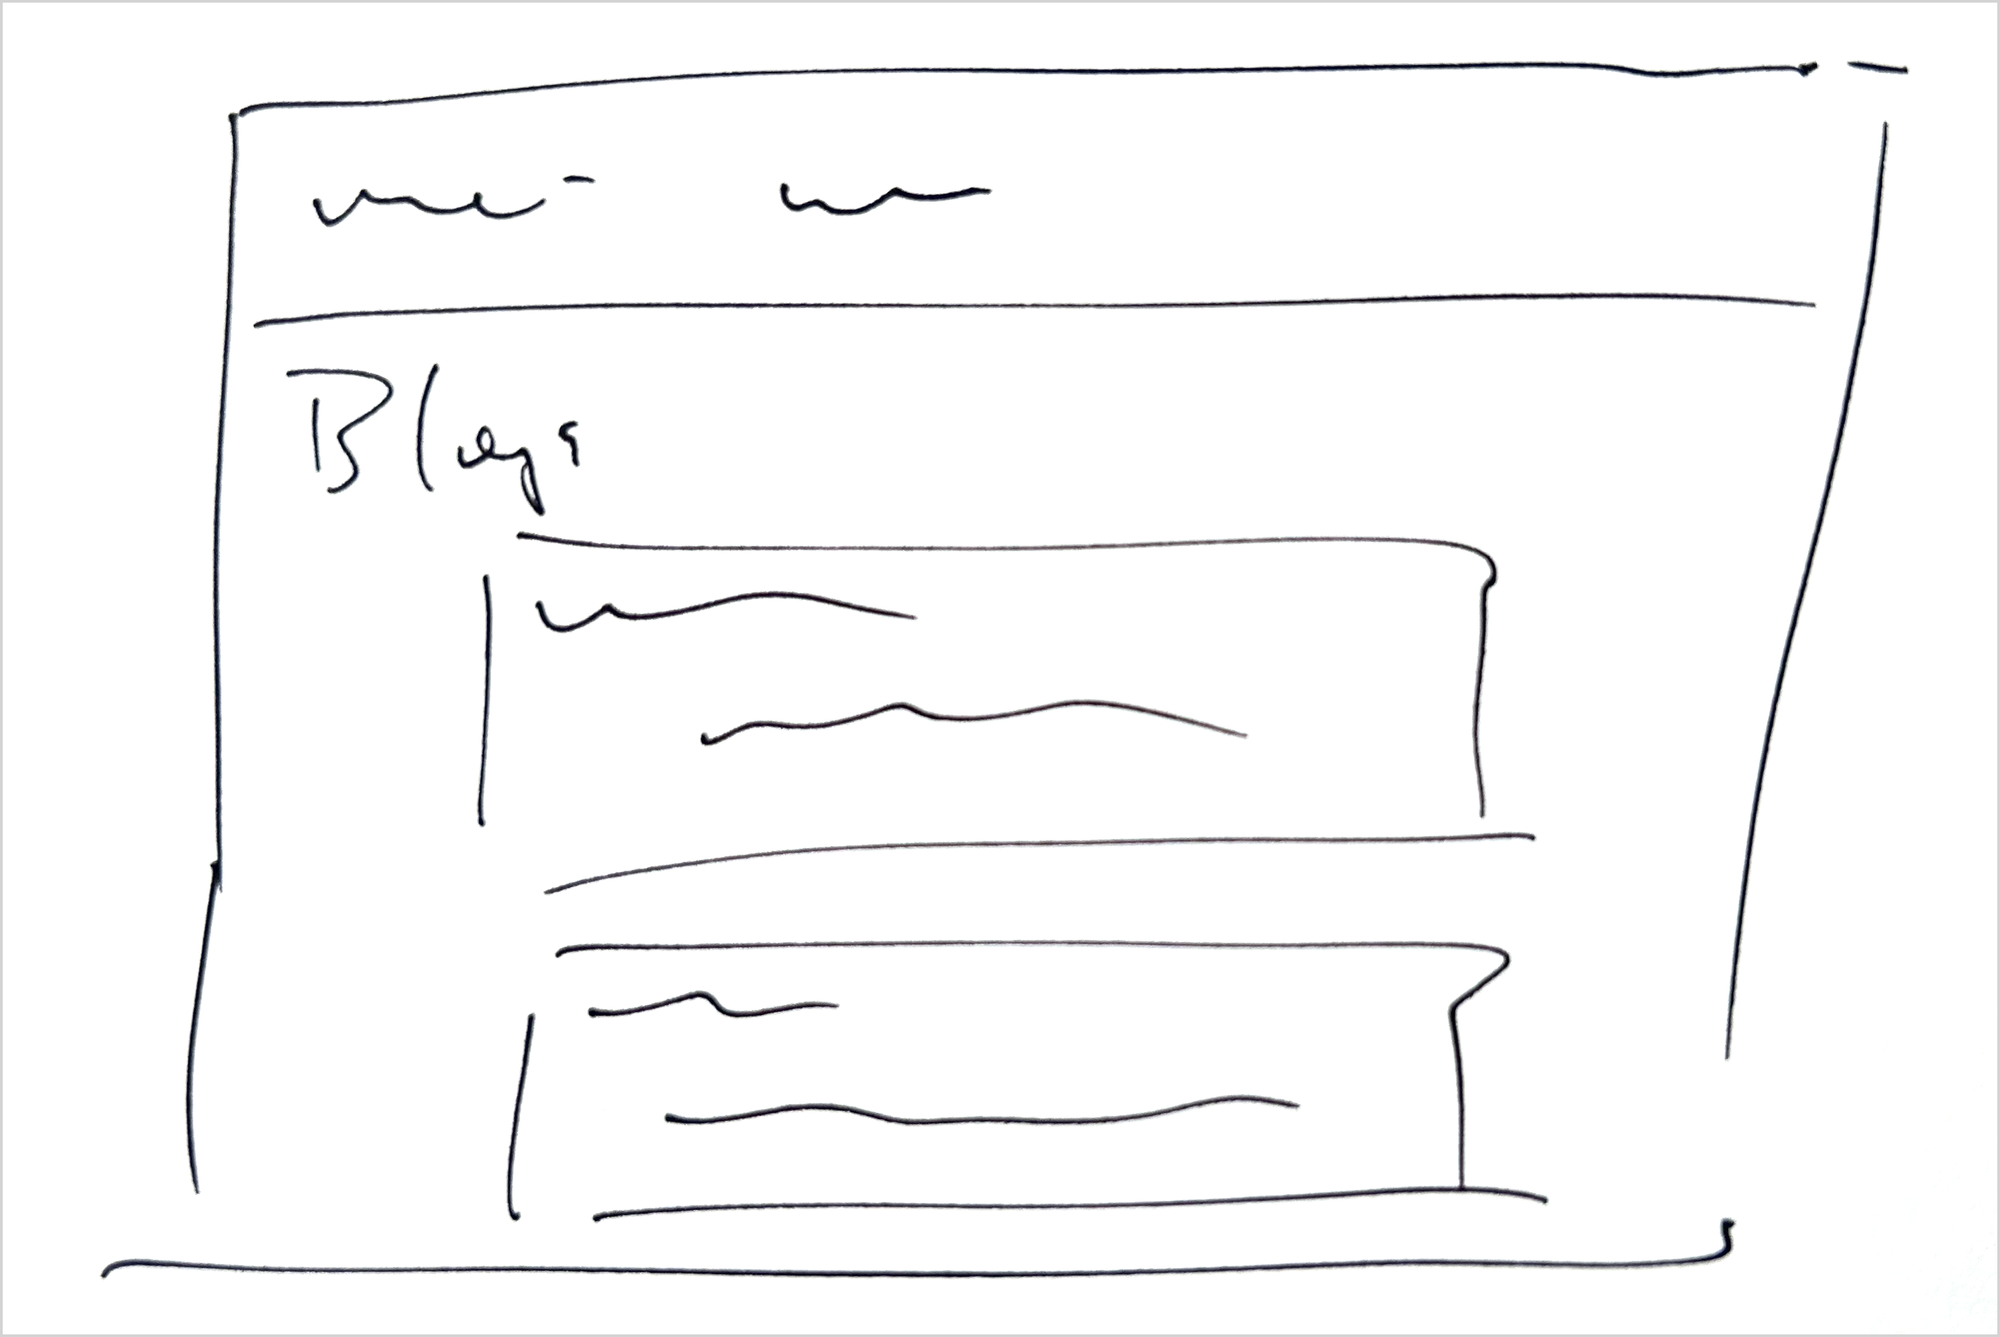
My main goal is to make the information associated with each blog stand out from all the other blogs on the page. We can do this by wrapping each blog's information in a container, and styling that container so it stands out from other containers on the page.
Using cards
A card is a container with default styling that makes an element on a web page stand out from other elements of the same kind. Here's chota's default implementation of a card:
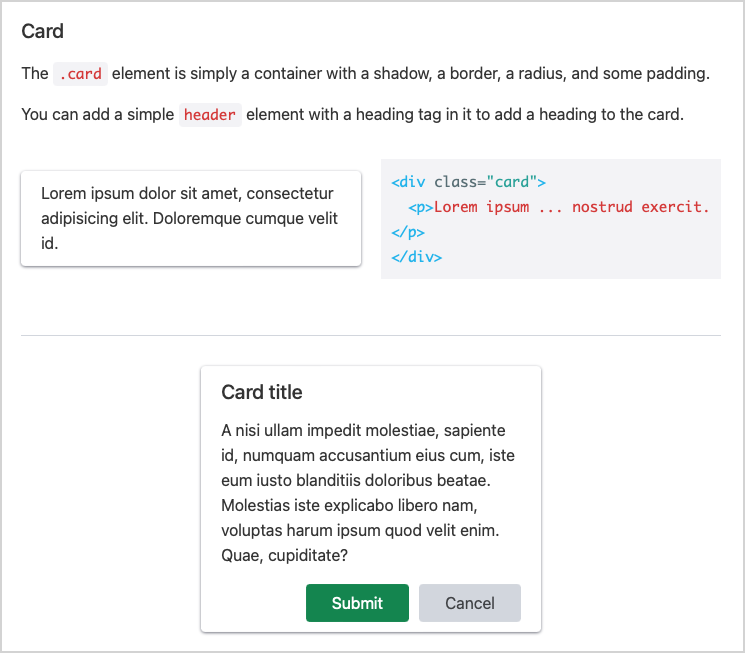
This is almost exactly what we're looking for. I'd like the cards to be a little wider than the ones shown here, and I think that will be possible. Let's add the basic card styling to each blog's information, and see what it looks like.
Here's the change that needs to be made to the blogs template:
{% extends "base.html" %}

{% block content %}

  <h2>Blogs</h2>

  {% for blog in blogs %}

    <div class="card">
      <header><h3>{{ blog.title }}</h3></header>
      <p>{{ blog.description }}</p>
    </div>

  {% empty %}
    <h3>No blogs have been added yet.</h3>
  {% endfor %}

{% endblock content %}We wrap the information about each blog in a div element with the class card. The title of each blog is wrapped in a header tag.
With those two changes, here's what the page looks like:
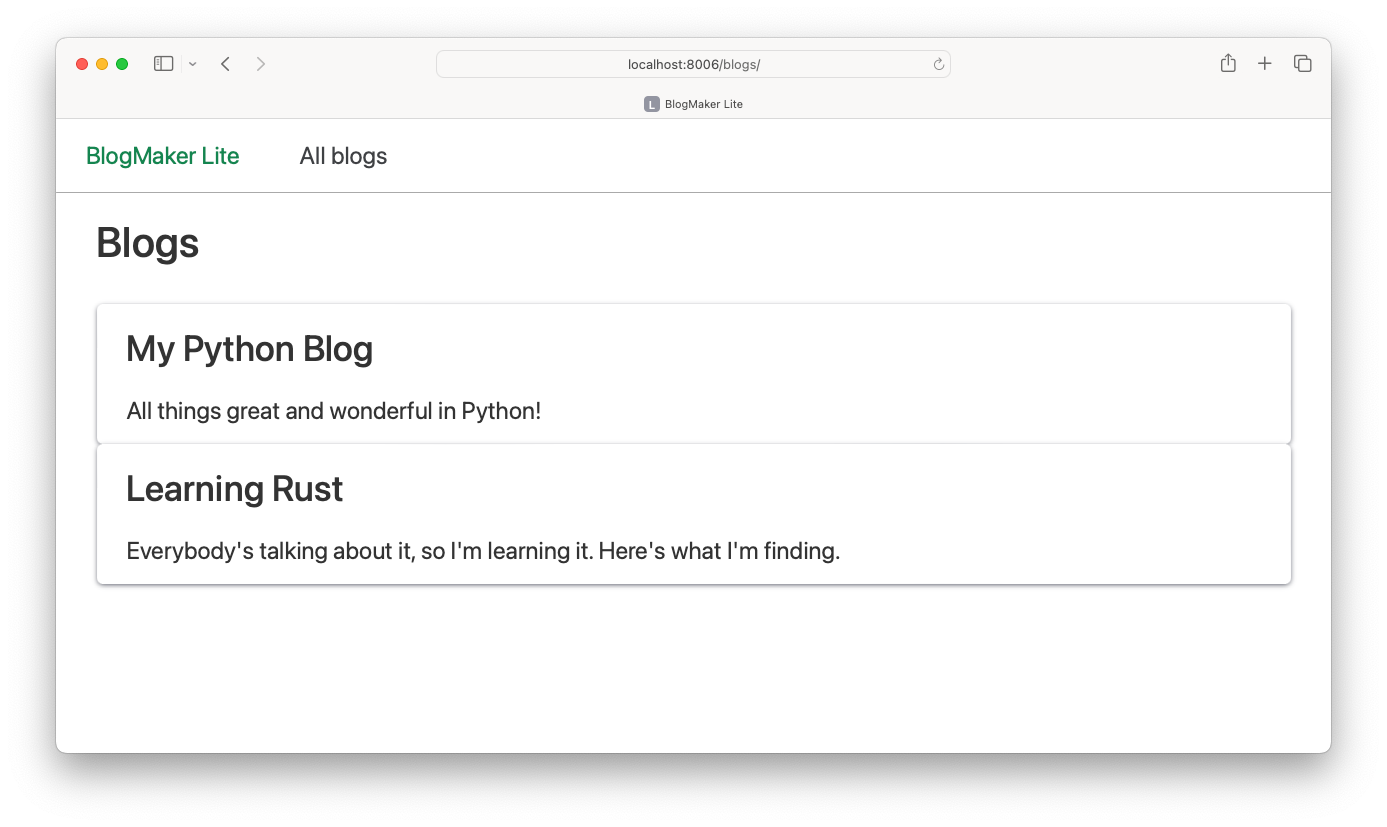
This looks okay; each card fills the width of the page, which is what I was hoping to see. But I'd like to have some separation between the cards, so the blogs don't blend together quite so much.
We can take care of the vertical spacing in our custom.css file:
...
.title {
    font-size: 2.5rem;
}

.card {
    margin-bottom: 15px;
}
Adding a bottom margin of 15 pixels puts a little space at the bottom of each card. Here's the result:
If you don't see a change after updating your CSS file, first make sure you saved the changes to the CSS file. If you still don't see that change, make sure you're refreshing your browser in a way that refreshes the browser's cache. Most browsers cache static files, which can make it frustrating to work out styling during development. On macOS Safari, you can do a hard refresh that updates the cache by pressing Command-option-R. If you're a web developer, it's worth learning your main browser's refresh commands so you know you're always seeing the latest iteration of your style settings.
This is good enough for now. As we develop the project further we'll add links from this page to each individual blog, and we'll clarify who the author of each blog is as well. As we add more information about each blog, the cards will play an even more important role in clarifying what information is associated with each blog.
Django's approach to static files
We could save this part for later, but now is actually a good time to develop a better understanding of how Django manages static files. There are currently two CSS files that we've added to the project:
$ tree -L 2
├── blogmaker_lite.py
├── blogs
│   ├── ...
├── css
│   ├── chota.css
│   └── custom.css
├── ...
But these aren't the only CSS files in the project. For example, there are a bunch of CSS files associated with the admin site:
$ find . -name "*.css"
./css/custom.css
./css/chota.css
./.venv/.../static/admin/css/widgets.css
./.venv/.../static/admin/css/dark_mode.css
./.venv/.../static/admin/css/login.css
...
./.venv/.../gis/static/gis/css/ol3.css
You'll find even more static files if you search for JavaScript files within the project.
Serving static files efficiently
For development work, it makes sense to keep all these static files in a variety of locations. For example, the CSS files associated with the admin site should be stored in a directory inside the admin app.
To serve all these files efficiently, however, they should all be collected into one central directory. That's where Django's collectstatic command comes in. The collectstatic command tells Django to find all static files in the entire project, and copy them to one central location.
The STATIC_ROOT setting tells Django where to copy the static files it finds:
...
STATIC_URL="static/"
STATICFILES_DIRS = [
    "css",
]

STATIC_ROOT = "staticfiles/"
There's an important difference between the STATIC_ROOT and STATIC_URL settings. STATIC_ROOT tells Django where to place the static files it finds. STATIC_URL tells Django how to generate a URL where static files are served at. STATICFILES_DIRS tells Django where to look for static files, in addition to the places where they're stored by default.
Running collectstatic
With STATIC_ROOT set, we can run collectstatic:
$  python manage.py collectstatic
128 static files copied to
    '/.../django-first-principles/staticfiles'.
Django found 128 static files throughout the project, and copied them all to the folder staticfiles/. If that folder wasn't already present, Django creates it when running collectstatic.
This brings up an important point; you shouldn't store any of your own static files in the directory that matches your STATIC_ROOT setting. If you do, Django will dump a bunch of other static files into that same directory, and things will get quite confusing.
Let's take a look in the staticfiles/ directory:
$ tree -L 2 staticfiles
staticfiles
├── admin
│   ├── css
│   ├── img
│   └── js
├── chota.css
└── custom.css
We can see that Django created a folder for the static files associated with the admin site, and has organized the collected static files into subdirectories as well. Our two static files from css/ are here as well.
Note that our original files are still in the original css/ folder as well:
$ tree -L 2
├── blogmaker_lite.py
├── css
│   ├── chota.css
│   └── custom.css
├── manage.py
├── settings.py
├── staticfiles
│   ├── admin
│   ├── chota.css
│   └── custom.css
└── ...
The collectstatic command copies static files to a central location, but it doesn't move any files.
Static files and runserver
You might be wondering why static files have been working so far, without having run collectstatic earlier. When the development server (runserver) is running and DEBUG is set to True, the development server finds static files in a manner similar to collectstatic. This doesn't happen in an actual deployment, so we'll come back to this at the end of the series when we deploy BlogMaker Lite to a remote server.
Ignoring STATIC_ROOT
It's a good idea to add your STATIC_ROOT directory to .gitignore, so those files aren't tracked a second time in your repository. When we deploy the project we'll run collectstatic on the server.
Conclusions
Static files are a common point of confusion for people who are just starting to learn Django. They can also be confusing for people who've used Django for a while, but haven't had to troubleshoot any issues specific to serving static files. Hopefully this approach with using a micro CSS framework has helped you understand how to think about static files within a typical Django project.
In the next post we'll go back to developing the functionality of the project, by building out a page that focuses on each individual blog. That page will look much nicer, and be more functional, with a CSS framework integrated into the project.
Resources
You can find the code files from this post in the django-first-principles GitHub repository. The commits from this post are on the part_8 branch. Commits for this branch start at 0b0ecd2, with the message Blogs page uses cards.
You may also want to review some relevant sections of Django's documentation:
- the
STATIC_ROOTsetting - the
STATIC_URLsetting - the
STATICFILES_DIRSsetting - the
statictemplate tag - the
collectstaticcommand