Django from first principles, part 13
MP 106: Letting users log in, and log out.
Note: This is the 13th post in a series about building a full Django project, starting with a single file. This series is free to everyone, as soon as each post comes out.
In the last post we restructured the project so that almost all the code for dealing with blogs was in one directory. This frees us to work on features that aren't explicitly tied to blogs, such as user accounts, without too much overlapping code. As we work on new features we'll be more thoughtful about where new code is placed, so we won't have to do so much restructuring later on.
In this post we'll start implementing a system for managing user accounts. We want users to be able to register new accounts, log in and out, and create their own blogs and blog posts. In real-world projects, people often implement a user registration system before building out any site-specific functionality. When teaching or writing about Django, I often start with content-focused pages, and then implement user accounts. It's a little more interesting to jump into a specific context than spend a bunch of work on infrastructure. Also, if you're only building a small tool for personal use, you might not even need user accounts beyond what the admin provides.
Allowing users to log in
If you ran generate_sample_data.py, you already have a user named fake_admin. Let's build a login page that lets existing users like fake_admin log in to the site.
Auth URLs
We're going to use Django's built-in auth system, so we'll start by including the default URLs for authentication pages.1 We want everything specific to accounts to go in one place, so make a folder called accounts/, and make a new urls.py file in that folder. Here's what goes in urls.py:
from django.urls import path, include
from django.contrib.auth import urls as auth_urls

app_name = "accounts"
urlpatterns = [
    path("", include(auth_urls)),
]
This call to path() includes the default URL patterns for account-related pages, such as a login page, and pages that let users change and reset passwords. If you wanted to make a custom page related to user accounts, such as a user profile page, you would define the URL for that page in this module.
Now we need to include this new urls.py module in blogmaker_lite.py:
from django.urls import path, include
from django.contrib import admin
from django.core.handlers.wsgi import WSGIHandler

urlpatterns = [
    path("admin/", admin.site.urls),
    path("accounts/", include("accounts.urls")),
    path("", include("blogs.urls")),
]

application = WSGIHandler()
All account-related URLs will now have a structure like this:
http://localhost:8000/accounts/login/Login settings
There are two changes we need to make in settings.py. First, we need to add accounts to the list of installed apps:
INSTALLED_APPS=[
    "blogs",
    "accounts",
    "django.contrib.admin",
    ...
]
Django does a lot of introspection based on what's listed in INSTALLED_APPS, which is how things like URLs and templates are found. Among other things, this tells Django to look for an accounts/ directory when doing that kind of inspection work.
We also need to add a new setting at the end of the file:
...
STATIC_ROOT = "staticfiles/"

LOGIN_REDIRECT_URL = "blogs:index"
When users log in, Django needs to know where to send them if authentication is successful. Here the LOGIN_REDIRECT_URL tells Django to redirect users to the URL pattern named index if the login was successful.
The login.html template
Django takes care of most of the background logic for authentication work, but we need to provide a template for the login page. This template will be called login.html, and the full path will be:
accounts/templates/registration/login.html
This is a slight variation on the path we used earlier for blog templates. When rendering registration-focused pages, Django looks for a template directory called registration/. The functionality we're focusing on relates to all aspects of accounts, which is why the outer folder is named accounts/.
Note: If it's unclear what to do here, make a folder called templates/ inside the accounts/ folder. Inside the templates/ folder, make a folder called registration/. Save a new file called login.html in that folder.
Here's what the login template should look like:
{% extends "blogs/base.html" %}

{% block content %}

  {% if form.errors %}
    <p>Your username and password didn't match. Please try again.</p>
  {% endif %}

  <form action="{% url 'accounts:login' %}" method='post'>
    {% csrf_token %}
    {{ form.as_div }}

    <button name="submit">Log in</button>
  </form>

{% endblock content %}The login template inherits from the same base.html template we've been using, so the login page will have the same look and feel as the rest of the site. This is part of the reason Django doesn't provide a default login template; there's no way to write a default version that matches the look and feel of every Django project.
Django's auth system provides a form that the template needs to include. In the template, we can decide what message to show if there are errors. When there's an error in processing a login request, it's good practice to just say that the provided credentials "didn't match", without being more specific than that. If you try to give more specific feedback, attackers can use that information to guess usernames and passwords.
The template displays the form as a set of div elements, and provides a button labeled Log in. If you visit the page http://localhost:8000/accounts/login/, you should see the following:
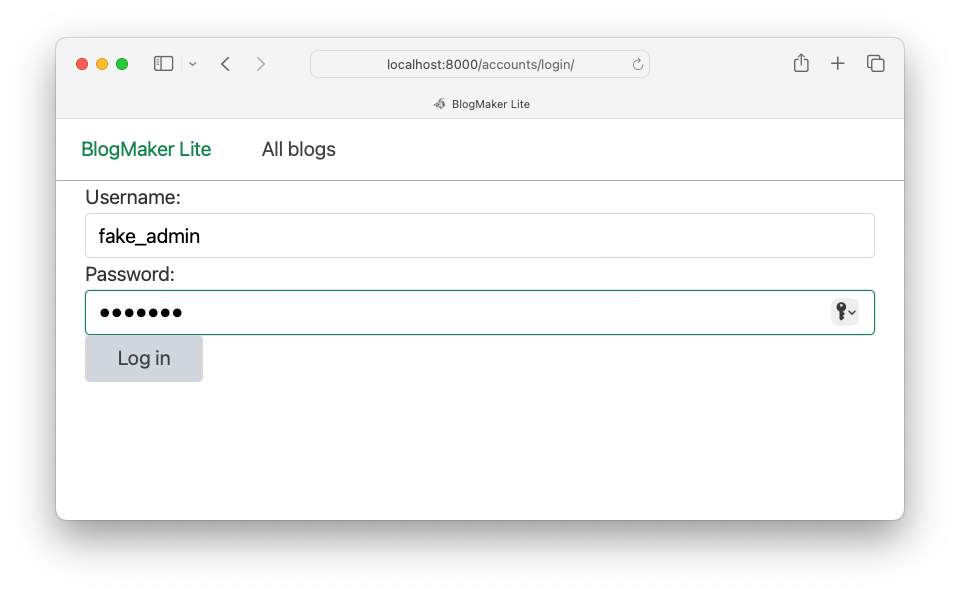
Our attention to styling earlier in the project means we already have a reasonable-looking login page. If you enter the fake admin user's credentials, you should be brought back to the home page.
Note: We'll build a way to log out in a moment. If you want to log out before we get to that, open a new tab and go to the admin page. You can click the log out link on the admin page, and it will log out the current user for the overall site as well.
Linking to the login page
Currently you have to enter the login URL manually in order to log in. Let's put a link to the login page on the navigation bar. We'll also display a welcome message if the user is already authenticated.
Here are the changes to the navigation bar in base.html:
<nav class="nav">
  <div class="nav-left">
    ...
  </div>

  <div class="nav-right">
    {% if user.is_authenticated %}
      <span>Hello, {{ user.username }}.</span>
    {% else %}
      <a href="{% url 'accounts:login' %}">Log in</a>
    {% endif %}
  </div>
</nav>
Inside the navigation bar, we make a new div element with the class nav-right. This creates a clear distinction between general site navigation elements on the left side of the navigation bar, and account-related links on the right side.
Django templates automatically receive a user object. The user object has several useful properties, such as is_authenticated. We display a personalized greeting if they've already been authenticated, which is a visual cue to the user that they're currently logged in.
If the user is not logged in, we display a link to the login page:
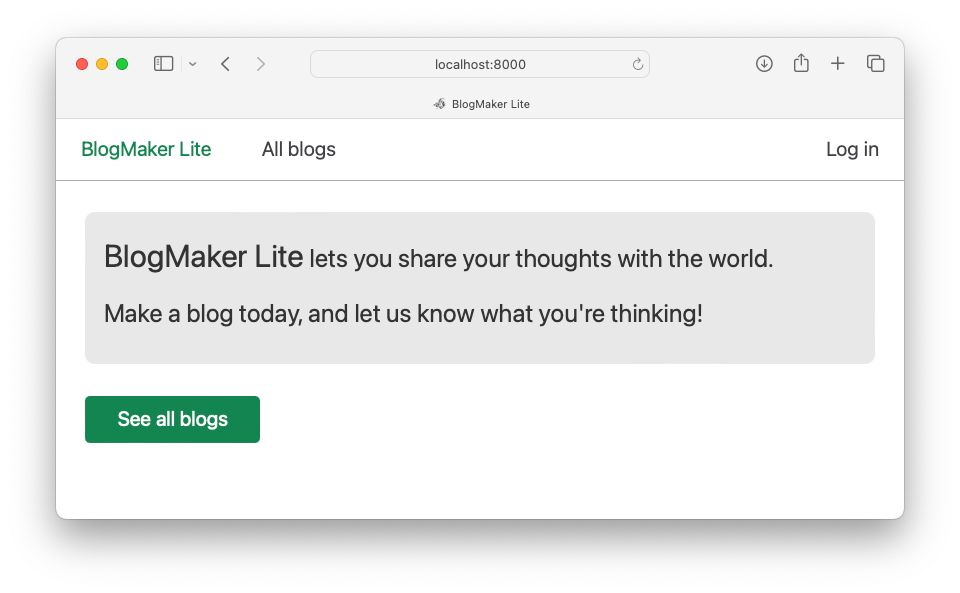
This works; if you click the login link you should be able to log in just as we did previously. The only issue is that the displayed username is not aligned like other elements on the navigation bar:
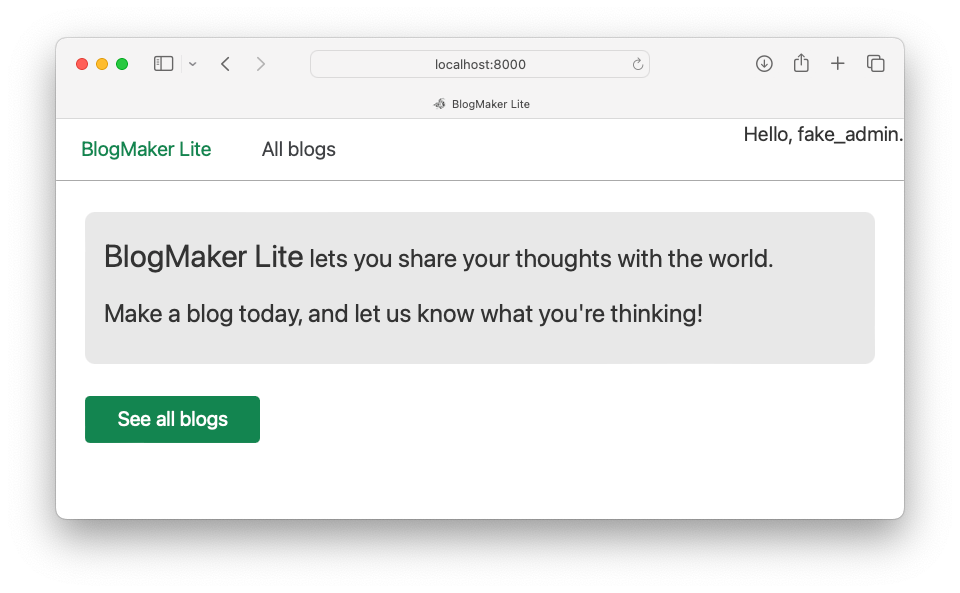
The stylesheet for chota includes some default rules that apply to links on the navigation bar. The span element that contains the username isn't affected by any of these rules. Let's fix that.
Here's the change to the span element in base.html:
<span class="is-vertical-align">Hello, {{ user.username }}.</span>
The class is-vertical-align is provided by chota, and it centers an element vertically in its container:
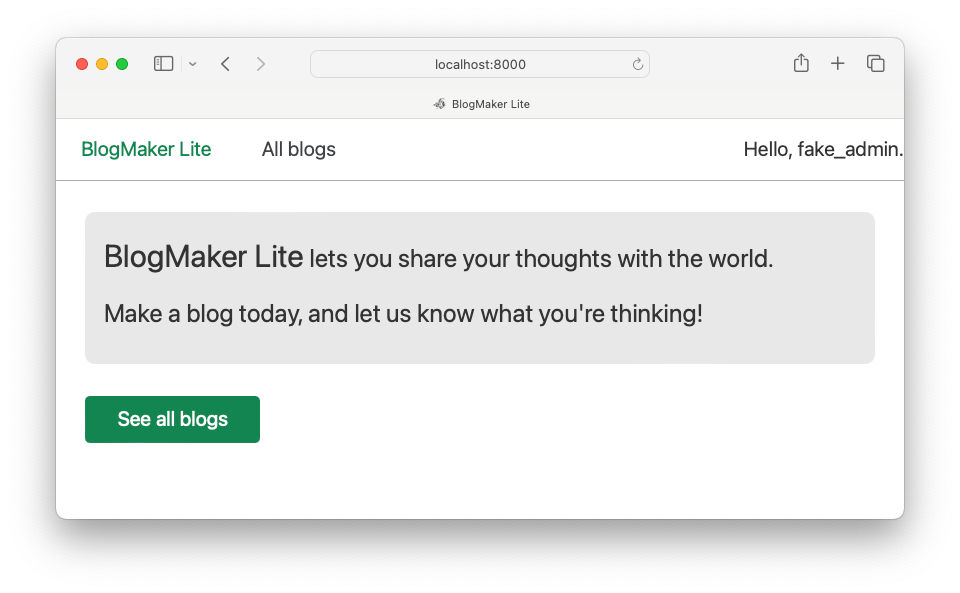
This is a small change, but it keeps elements on the navigation bar from jumping around as users log in and log out. The greeting is right up against the right margin, but we'll take care of that in a moment.
Allowing users to log out
Users can log in, so now we need to give them a way to log out. Logging out needs to happen through a form. If you use a simple link to log out, it's easier for attackers to make links that log users out when they don't intend to. Running the logout request through a form prevents this kind of attack.2
We'll place the logout form on the right side of the navigation bar, in base.html:
<div class="nav-right">
  {% if user.is_authenticated %}
    <span class="is-vertical-align">
      Hello, {{ user.username }}.</span>

    <form action="{% url 'accounts:logout' %}" method="post"
        class="is-vertical-align">
      {% csrf_token %}
      <button class="button outline">Log out</button>
    </form>

  {% else %}
    <a href="{% url 'accounts:login' %}">Log in</a>
  {% endif %}
</div>
This is a form that calls the default logout view, provided by Django's authentication system. Django uses the {% csrf_token %} to prevent cross-site forgery attacks, and this token is required in all forms. This is an empty form; the user will only see a button labeled Log out. Note that this form has the is-vertical-align CSS rule, just like the greeting did earlier.
Next we need to add the middleware that processes CSRF tokens, in settings.py:
MIDDLEWARE = [
    'django.contrib.sessions.middleware.SessionMiddleware',
    'django.middleware.csrf.CsrfViewMiddleware',
    'django.contrib.auth.middleware.AuthenticationMiddleware',
    'django.contrib.messages.middleware.MessageMiddleware',
]
Make sure this new line is placed after SessionMiddleware, and before AuthenticationMiddleware.
We also need to add one more line at the very end of settings.py:
...
LOGIN_REDIRECT_URL = "blogs:index"
LOGOUT_REDIRECT_URL = "blogs:index"
The LOGOUT_REDIRECT_URL functions just like LOGIN_REDIRECT_URL. When users log out, Django needs to know where to send them. Here we're redirecting them to the site's home page when they log out.
Now any user who has logged in will see the welcome message, and a link that lets them log out:
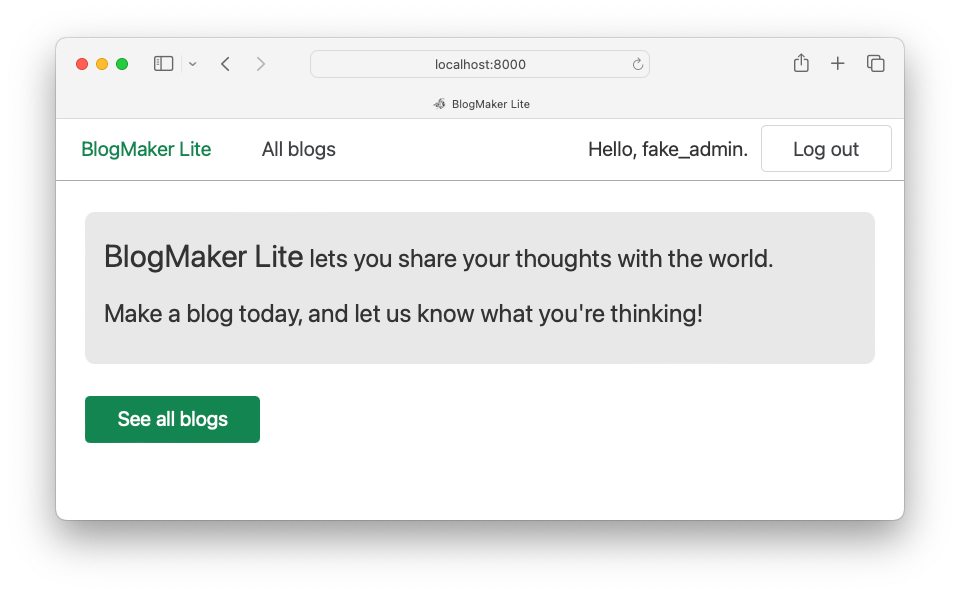
You should now be able to log in and log out as many times as you like. The logout button has some padding around it, which addresses the horizontal placement of the greeting as well.
Conclusions
Django handles most of the user authentication workflow on its own. When implementing a login and logout flow, most of the code we have to write focuses on integrating Django's functionality with the look and feel of the specific site we're building. Most of the work in this post took place in templates, where we chose how to display the login and logout links. In the next post we'll give users a way to register new accounts.
Resources
You can find the code files from this post in the django-first-principles GitHub repository. The commits from this post are on the part_13 branch. Commits for this branch start at f03d37, with the message Login page works.
You may also want to visit the documentation page Using the Django authentication system, which gives a detailed overview of the entire auth system.
There's an important distinction between authentication and authorization. Authentication refers to the process of determining if a user is who they claim to be. This is often done with username and password combinations, or email-based login systems. Authorization refers to the process of deciding who gets to see what content. For example, for a given page on a site, you may be authenticated on the site, but not authorized to view that page.
Most of the references to auth in this post refer to authentication, because we're just dealing with logging in and logging out. But Django's auth system helps with both authentication and authorization tasks. The term auth is often used as shorthand for authentication and authorization.
For example if clicking the link http://localhost:8000/accounts/logout/ caused the user to be logged out, anyone could place that link on any site!
Imagine you're logged in to BlogMaker Lite. You visit a malicious site, which shows a message "Click here for a chance to win a new MacBook Pro!" But that link doesn't enter you in a contest, the actual link is to http://localhost:8000/accounts/logout/. Even though you're not on BlogMaker Lite, you'll be logged out!
Requiring logouts to take place through a simple form prevents this kind of attack, because Django can ensure that you were on the BlogMaker Lite site when you clicked the logout button.

