Django from first principles, part 17
MP 112: Letting users write new posts.
Note: This is the 17th post in a series about building a full Django project, starting with a single file. This series is free to everyone, as soon as each post comes out.
In the last post we gave users the ability to create new blogs; now we need to give them a way to write posts for their blog. This will be quite similar to the work we did when building the new_blog page. Instead of focusing on the Blog model, we'll focus on the BlogPost model.
The BlogPostForm class
We need a way for users to enter the information necessary to create a new post. Users will enter that information into a form, and the form needs to be based on the BlogPost model. We'll use a ModelForm again, so that Django can do most of the grunt work for us.
Add the following code to forms.py:
from django import forms

from .models import Blog, BlogPost

class BlogForm(forms.ModelForm):
    ...

class BlogPostForm(forms.ModelForm):
    class Meta:
        model = BlogPost
        fields = ["title", "body"]
We need to import the BlogPost model that the form will be based on. We then create a new form class called BlogPostForm, which is linked to the BlogPost model. The form includes two fields, so users can enter the title and body for a new post.
The new_post URL
Now we need to define a URL pattern for the new post page. URLs for this page should look like this:
http://localhost:8000/new_post/1/
Notice the parameter at the end of the URL. A new post will need to be associated with a specific blog; that final parameter is an ID specifying which blog the new post should be assigned to.
Here's the more general form of this URL:
http://localhost:8000/new_post/<blog-id>/
The new URL pattern is defined in blogs/urls.py:
...
urlpatterns = [
    ...
    path("new_blog/", views.new_blog, name="new_blog"),
    path("new_post/<int:blog_id>/", views.new_post, name="new_post"),
    path("", views.index, name="index"),
]
This URL pattern will capture the value of the blog ID, and pass it to the new_post() view function through an argument named blog_id. The new pattern can be referred to by the name new_post.
The new_post() view function
The view function needs to return a blank form when users first visit the new_post page, and process a completed form when they click the submit button.
Here's the new function, in views.py:
...
from .models import Blog, BlogPost
from .forms import BlogForm, BlogPostForm

...
@login_required
def new_post(request, blog_id):
    blog = Blog.objects.get(id=blog_id)

    if request.method != "POST":
        form = BlogPostForm()
    else:
        form = BlogPostForm(data=request.POST)
        if form.is_valid():
            new_post = form.save(commit=False)
            new_post.blog = blog
            new_post.save()
            return redirect("blogs:blog", blog_id)

    context = {"form": form, "blog": blog}
    return render(request, "blogs/new_post.html", context)
Inside the function, we first get the blog that this new post will be associated with. If the current request is anything other than a POST request, we return a blank form.
For POST requests, we create a form object from the data that was submitted:
form = BlogPostForm(data=request.POST)
If this form object is valid, we call form.save() with the commit flag set to False. We can then modify the new_post object before saving it to the database. The modification is one line; we assign the post to the blog that we retrieved at the start of the function:
new_post.blog = blog
Once it's been assigned to the right blog, we can save the new post to the database. After the post is saved we redirect the user to the blog page, where they should see a link to their post.
The context dictionary includes the form and the blog, because the page will include some information about the blog that the new post is associated with.
Note: If any of this is unclear, consider re-reading the section about the new_blog() function from the previous post, which covers these same concepts in more detail.
The new_post template
The new_post() view function processes the form, and sends information to the template in order to render the page.
Here's the template, saved as blogs/templates/blogs/new_post.html:
{% extends "blogs/base.html" %}

{% block content %}

  <h2>{{ blog.title }}</h2>
  <h3>Write a new post:</h3>

  <form action="{% url 'blogs:new_post' blog.id %}" method="post">
    {% csrf_token %}
    {{ form.as_div }}
    <button class="button primary" name="submit">Save post</button>
  </form>

{% endblock content %}Like all other templates in the project, this template inherits from the base template so it has the same look and feel as the rest of the site's pages. We display the blog title, and a header indicating the form can be used to make a new post.
The form's action field submits data to the new_post URL, along with the ID of the blog the post is associated with.
Linking to the new_post page
The most natural place for a link to the new post page is on the main page for each blog. So, we'll add a link in the blog.html template:
{% extends "blogs/base.html" %}

{% block content %}
  ...
  {% empty %}
    <h3>No posts have been written yet.</h3>
  {% endfor %}

  <a class="button primary"
    href="{% url 'blogs:new_post' blog.id %}">New post</a>
{% endblock content %}
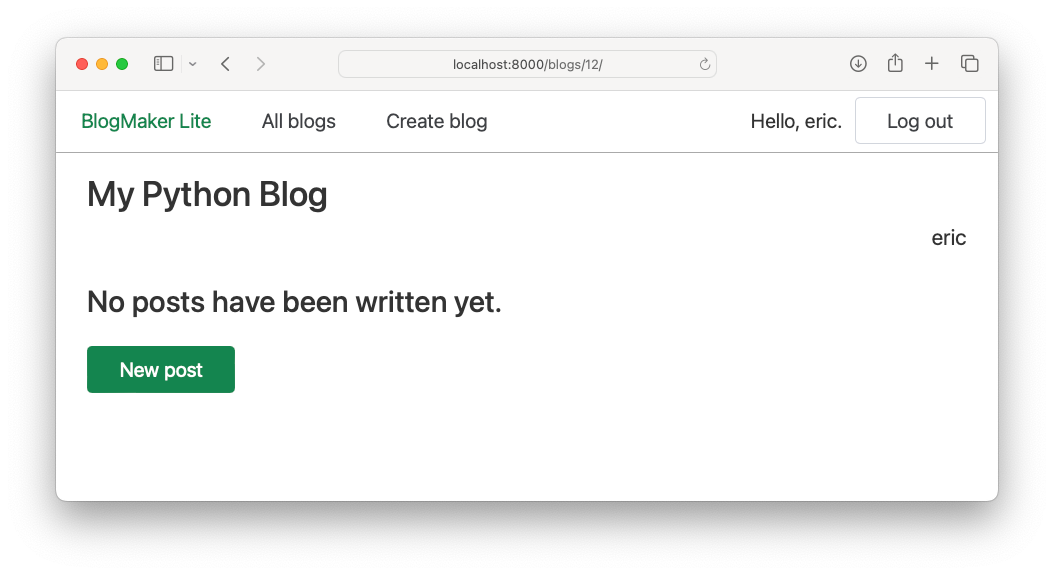
With this change, a button labeled New post will appear after the list of posts for each blog. If a blog doesn't have any posts yet, this button will appear just below the message stating there are no posts yet.
Using the new_post page
If you make a new blog and visit that blog's page, you should see a screen like this:

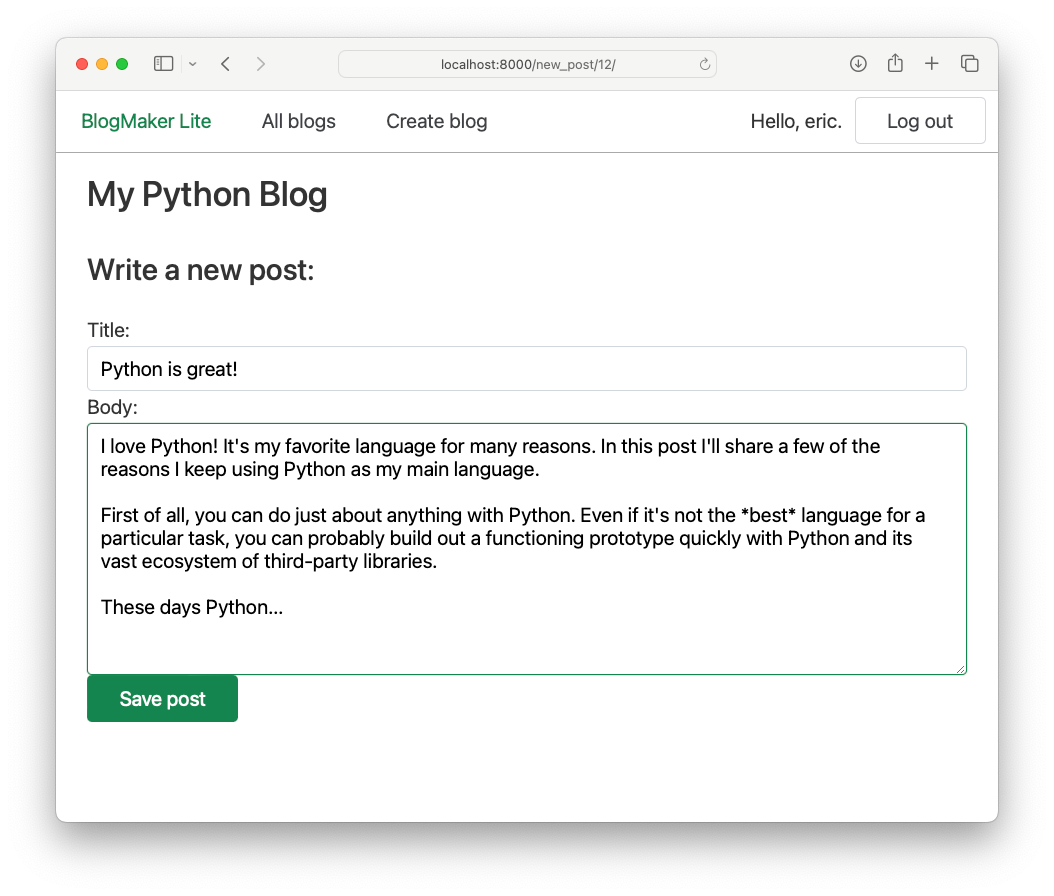
If you click the link, you'll see a form where you can write a new post:

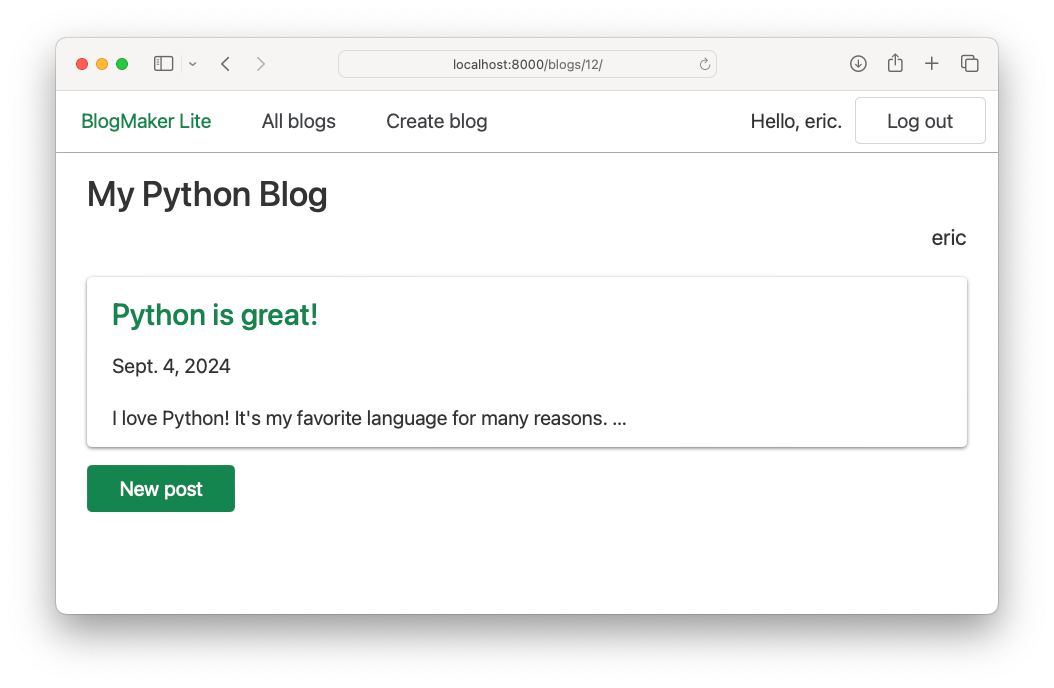
If you click the Save post button, you should see your new post on the blog's page:

Users can now freely create their own blogs, and write new posts as often as they want.
Protecting the new_post page
The new_post page works, but there's a significant problem with how it works. If you go to a blog that you don't own, you'll see the link to the new post page. If you write a new post and click the submit button, your post will be added to that person's blog!
We need to put a couple guards in place to prevent this. First, we'll only show the link to the new post page if the user owns the blog they're looking at. We'll implement this in the blog template:
{% extends "blogs/base.html" %}

{% block content %}
  ...
  {% empty %}
    <h3>No posts have been written yet.</h3>
  {% endfor %}

  {% if request.user == blog.owner %}
    <a class="button primary"
      href="{% url 'blogs:new_post' blog.id %}">New post</a>
  {% endif %}

{% endblock content %}Every template has access to the request object by default. One attribute of therequest object is user, which represents the current user. That could be an anonymous user with no credentials, or an authenticated user.
Here we wrap an if block around the link to the new post page, so it's only displayed if the current user matches the blog's owner. Users who don't own the blog they're looking at will not see this link.
Protecting the view function
This is a good start. However, if you know the ID of a blog you want to add a post to, you can still enter the URL manually. For example if I want to sneak a post onto the blog with the ID 23, I can just type the following URL into a browser's address bar:
http://localhost:8000/new_post/23/
If I know this URL, I don't need a link to that page. One of the simplest ways to protect the actual functionality of creating a new post is to check the user in the view function itself.
Here's a slight addition to the new_post() view function that makes sure only blog owners can add posts to their blog:
@login_required
def new_post(request, blog_id):
    blog = Blog.objects.get(id=blog_id)

    # Only allow blog owners to add new posts.
    if request.user != blog.owner:
        return redirect("blogs:index")

    if request.method != "POST":
        ...
The logic here is the same as what's implemented in the template. The syntax is slightly different because this is pure Python, rather than the Django template language. If the current user does not own the blog they're trying to add a new post to, we redirect them to the home page.
You could also consider showing them a generic 404 page, or a "Permission denied" page, or maybe send them to the page for creating a new blog. The point is to not let them add a post to a blog they don't own, and to avoid telling them too much about what kind of unusual usage you noticed.
It's worth pointing out that you could build in functionality that lets blog owners allow guests to write posts on their blog. You'd do this by adding logic to the new_post() function that checks a list of allowed guests, and then redirects all users who aren't the blog's owner, and are not in the list of allowed guest writers.
Conclusions
Now that users can create new blogs and write new posts, we're almost finished with the series. We've gone from a single-file home page to a functioning app. In the next post we'll do some restructuring of the overall project, and then we'll close out by making an initial deployment to a hosting service.
Resources
You can find the code files from this post in the django-first-principles GitHub repository. The commits from this post are on the part_17 branch. Commits for this branch start at 37c558, with the message New post page works.


