Django from first principles, part 15
MP 109: Connecting users with blogs.
Note: This is the 15th post in a series about building a full Django project, starting with a single file. This series will be free to everyone, as soon as each post comes out.
In the last post we finished setting up user accounts. Users can now create accounts, and log in and out. Our next step is to let users create new blogs, and write posts on their blogs. In this post, we'll prepare for that work by associating each blog with a specific user.
Connecting users to blogs
What exactly does it mean to "connect" a user to a blog? To answer that question, we need to consider the relationship between a user and a blog. To keep things simple, we'll say that each user can own a blog. That means every blog must have an owner. We won't deal with the idea of multiple people sharing a blog, although that would be an interesting feature to implement if you were building a real-world version of BlogMaker Lite.
Relationships like this are maintained in the database, but they're defined in the project's models. Let's modify the Blog model, so that every blog has an owner.
Updating the Blog model
Each blog must belong to one user, but each user can have multiple blogs. This is called a many-to-one relationship, and it's implemented through a foreign key from one model to another.
Open models.py from the blogs/ directory, and add the following two lines:
from django.db import models
from django.contrib.auth.models import User

class Blog(models.Model):
    title = models.CharField(max_length=200)
    description = models.TextField()
    date_added = models.DateTimeField(auto_now_add=True)
    owner = models.ForeignKey(User, on_delete=models.CASCADE)

    def __str__(self):
        return self.title

class BlogPost(models.Model):
    ...
We first import Django's built-in User model. We then define a ForeignKey field called owner on the Blog model. This connects each instance of Blog with a specific instance of the User model. The on_delete argument says that if a user is deleted, all the blogs associated with that user should be deleted as well. This is just like the foreign key relationship we defined earlier between blog posts and blogs.
Making the migration file
Whenever you update a model you need to update the database as well, so it can correctly store instances of that model. Let's try to make a new migrations file by running makemigrations:
$ python manage.py makemigrations blogs
It is impossible to add a non-nullable field 'owner' to blog
without specifying a default. This is because the database
needs something to populate existing rows.
Please select a fix:
 1) Provide a one-off default now...
 2) Quit and manually define a default value in models.py.
Select an option:
Django can't make a migrations file until it knows what to do with the existing blogs. To be more specific, the migration file needs to assign a user to each existing blog. I didn't know which user to specify here, so I entered 2 to quit this operation.
To figure out how to proceed, you can use a shell session to see all existing users:
$ python manage.py shell
>>> from django.contrib.auth.models import User
>>> users = User.objects.all()
>>> for user in users:
...   user.username, user.id
...
('fake_admin', 1)
In the shell session, we import the User model just as it's imported into models.py. We then look at the username and ID of each existing user. I'm still working with the data generated by generate_sample_data.py, so I only have the one user, named fake_admin. That user's ID is 1. This is the piece of data Django uses to establish foreign key relationships, so this is the value to enter when prompted for an owner in the makemigrations call.
Let's run makemigrations again, now that we know what to enter:
$ python manage.py makemigrations blogs
It is impossible to add a non-nullable field...
Please select a fix:
 1) Provide a one-off default now...
 2) Quit and manually define a default value...
Select an option: 1
Please enter the default value as valid Python.
...
>>> 1
Migrations for 'blogs':
  blogs/migrations/0003_blog_owner.py
    - Add field owner to blog
Django is looking for a user ID it can use as the foreign key to the User model for all existing blogs. I entered 1, the ID of the fake_admin account. The output shows that Django was able to use this information to create a new migrations file called 0003_blog_owner.py.
If you open up that file, you can see how the ID we entered was used:
class Migration(migrations.Migration):
    ...
    operations = [
        migrations.AddField(
            model_name="blog",
            name="owner",
            field=models.ForeignKey(
                default=1,
                on_delete=django.db.models.deletion.CASCADE,
                to=settings.AUTH_USER_MODEL,
            ),
            preserve_default=False,
        ),
    ]
This migration adds a field (AddField), which is a foreign key to settings.AUTH_USER_MODEL. The default value is the user with ID 1, just as we specified.
Now we can actually run the migration:
$ python manage.py migrate
Operations to perform:
  Apply all migrations: admin, auth, blogs, ...
Running migrations:
  Applying blogs.0003_blog_owner... OK
Django applied the new migration, and everything seems to be okay.
Updating the sample data script
The default value we just entered applied to previously existing data, but it doesn't apply to newly-generated data. So, if you try to run generate_sample_data.py at this point, you'll get an error:
$ python generate_sample_data.py
Flushed existing db.
Superuser created successfully.
Traceback (most recent call last):
...
File "/.../sqlite3/base.py", line 329, in execute
    return super().execute(query, params)
           ^^^^^^^^^^^^^^^^^^^^^^^^^^^^^^
django.db.utils.IntegrityError:
    NOT NULL constraint failed: blogs_blog.owner_id
The owner field is a required field for every new instance of Blog, but our sample data script doesn't tell Django which user it should connect each sample blog to.
Let's fix this by connecting each new blog with a random user. We need to do this in model_factories.py:
...
from faker import Faker

from django.contrib.auth.models import User

from blogs.models import Blog, BlogPost

...
def get_blog_owner():
    users = User.objects.all()
    return choice(users)

def get_blog():
   ...

class BlogFactory(factory.django.DjangoModelFactory):
    class Meta:
        model = Blog

    title = factory.LazyFunction(get_title)
    description = factory.LazyFunction(get_description)
    owner = factory.LazyFunction(get_blog_owner)

class BlogPostFactory(factory.django.DjangoModelFactory):
    ...
We need to import the User model. We then define a new function, get_blog_owner(). This function queries for all existing users, and returns a random user. We add one line to the BlogFactory class, which sets the owner field of each sample Blog instance using the get_blog_owner() function.
With this change you should be able to run generate_sample_data.py again, without any errors. It will flush the database, and generate a new set of valid sample data. If you're looking for a challenge and a way to make the work we're about to do more interesting, consider modifying generate_sample_data.py so it generates a number of different users before making the sample blogs. That way all blogs won't be owned by the fake_admin user. (Here's a working implementation.)
Displaying blog owners
Now that someone owns each blog, there are three places we should show that information. We should display it on the blogs page, the page that shows a single blog, and on each post's page as well.
Updating the blogs page
Let's start by showing the owner of each blog on the blogs page. The template for this page already has access to all the data associated with each blog, so all we need to do is modify blogs.html.
Here's how to show the blog owner's name on the card that represents each blog:
<div class="card">
  <header>
    <h3>
      <a href="{% url 'blogs:blog' blog.id %}">{{ blog.title }}</a>
    </h3>
  </header>
  <p>{{ blog.description }}</p>
  <p class="text-right">{{ blog.owner.username }}</p>
</div>
After the paragraph that shows the blog's description, we add a paragraph showing the owner's username. We add chota's text-right class, to place the owner's name in the bottom right corner of each card:
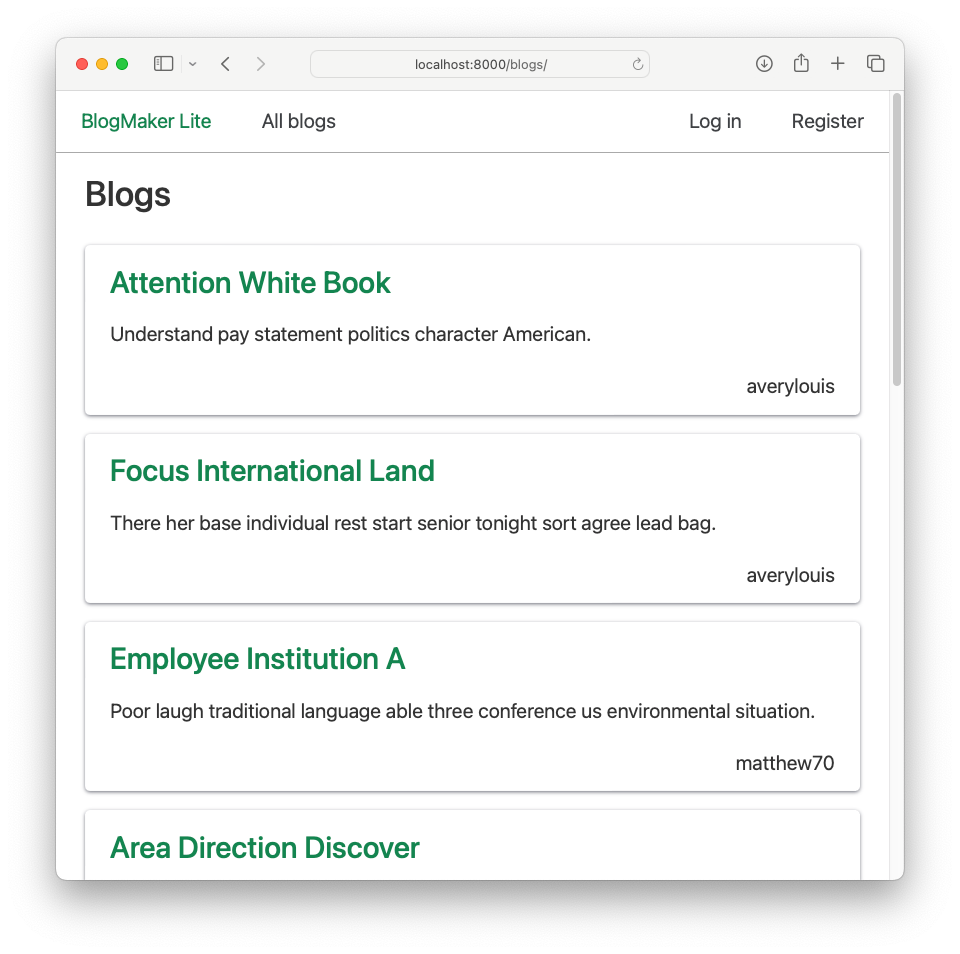
Now users can easily see who maintains each blog.
Updating the blog page
Similarly, adding the blog's owner to the blog page is a one-line change in blog.html:
{% extends "blogs/base.html" %}

{% block content %}

  <h2>{{ blog.title }}</h2>
  <p class="text-right blog-owner">{{ blog.owner.username }}</p>

  {% for post in posts %}
...Using just the text-right attribute left the username a little too small for me, and it also used more vertical space than necessary. I added the blog-owner class, and updated custom.css to address those issues:
...
p.blog-owner {
    font-size: 1.75rem;
    margin-top: -20px;
}
You should be careful using negative margins to address layout, but in this early development phase it works well enough for the page renderings I'm seeing:
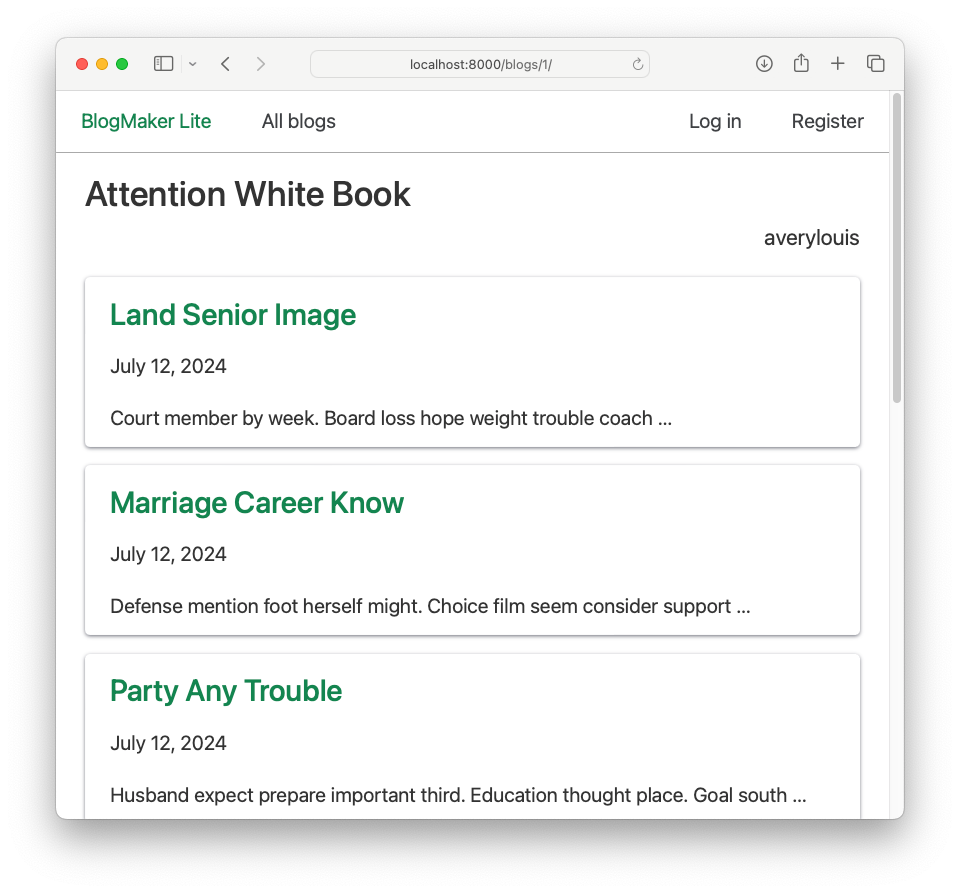
Now when users look at a single blog's page, they see the owner's name between the title and the list of posts.
Updating the post page
Adding the blog owner to the post page is a one-line change as well:
{% extends "blogs/base.html" %}

{% block content %}

  <h2>{{ post.title }}</h2>
  <p class="text-right blog-owner">{{ blog.owner.username }}</p>
  ...
The style rules that worked for the blog page work well enough for the post page also:
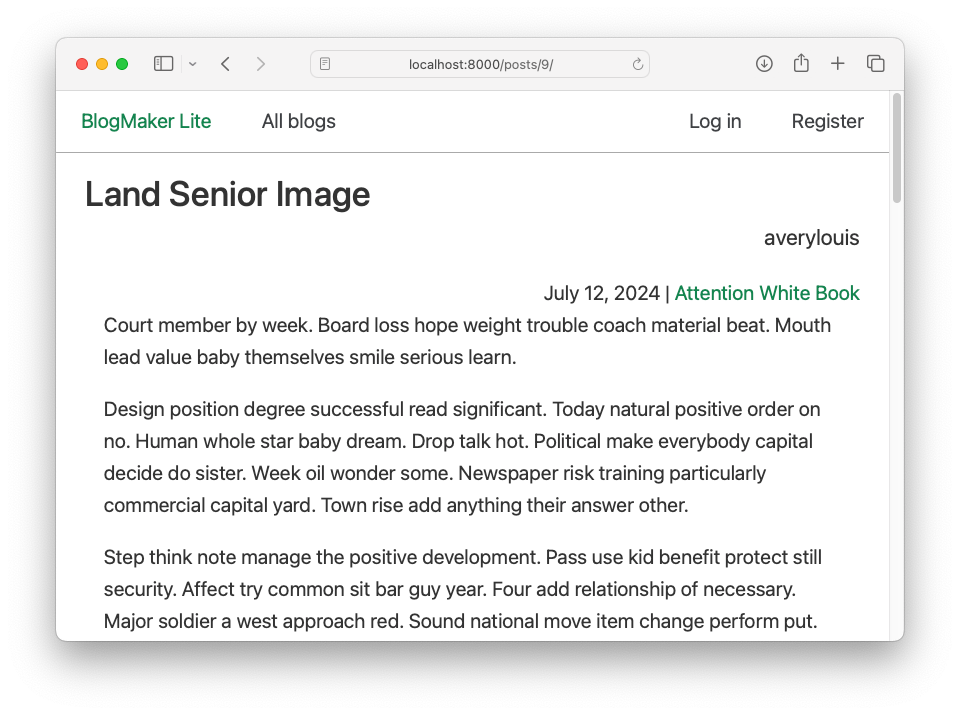
We're assuming the blog owner is the author of all posts, but the process of displaying the author would be similar even if blogs evolve to have multiple authors.
Conclusions
Once you have user accounts set up, things like "ownership" of a resource can be implemented through a foreign key to a specific user, or group of users. Foreign keys are powerful. Note that we never defined a relationship between blog posts and users, but we can deduce that relationship by working up the hierarchy. Every post belongs to a blog, and every blog belongs to a user. In fully-developed projects, these kinds of relationships tend to have many layers.
We're almost finished! In the next post, we'll build a page that lets users create new blogs. When we're done people will be able to make a new account, and start their own blog in just minutes.
Resources
You can find the code files from this post in the django-first-principles GitHub repository. The commits from this post are on the part_15 branch. Commits for this branch start at 4a3be9, with the message Added owner to Blog model.

