Deploying simple Streamlit apps
MP 81: It's straightforward, but there are some things to be aware of.
In a recent post, I showed how to make a simple dashboard using Streamlit. The example dashboard had several inputs that let you choose what kind of dice to use, how many dice to roll, and how many rolls to include in the simulation.
In this post we’ll see how to deploy a simple project like this to Streamlit’s Community Cloud hosting service. It’s a fairly straightforward process, but there are a couple privacy issues you might want to be aware of.
What is Community Cloud?
Streamlit refers to projects as apps, because once you have a working project it functions like an app. I’ve been talking about dashboards, but Streamlit is flexible enough that what you create doesn’t have to look like a dashboard.
When you’ve built a functioning app with Streamlit, you’ll almost certainly want to deploy it somewhere so others can use it as well. Because Streamlit is an open source project that can be installed with pip, it can be deployed in the same way you deploy any Python code: on a physical server, on a VPS such as Digital Ocean or Linode, or on a managed Platform like Heroku.
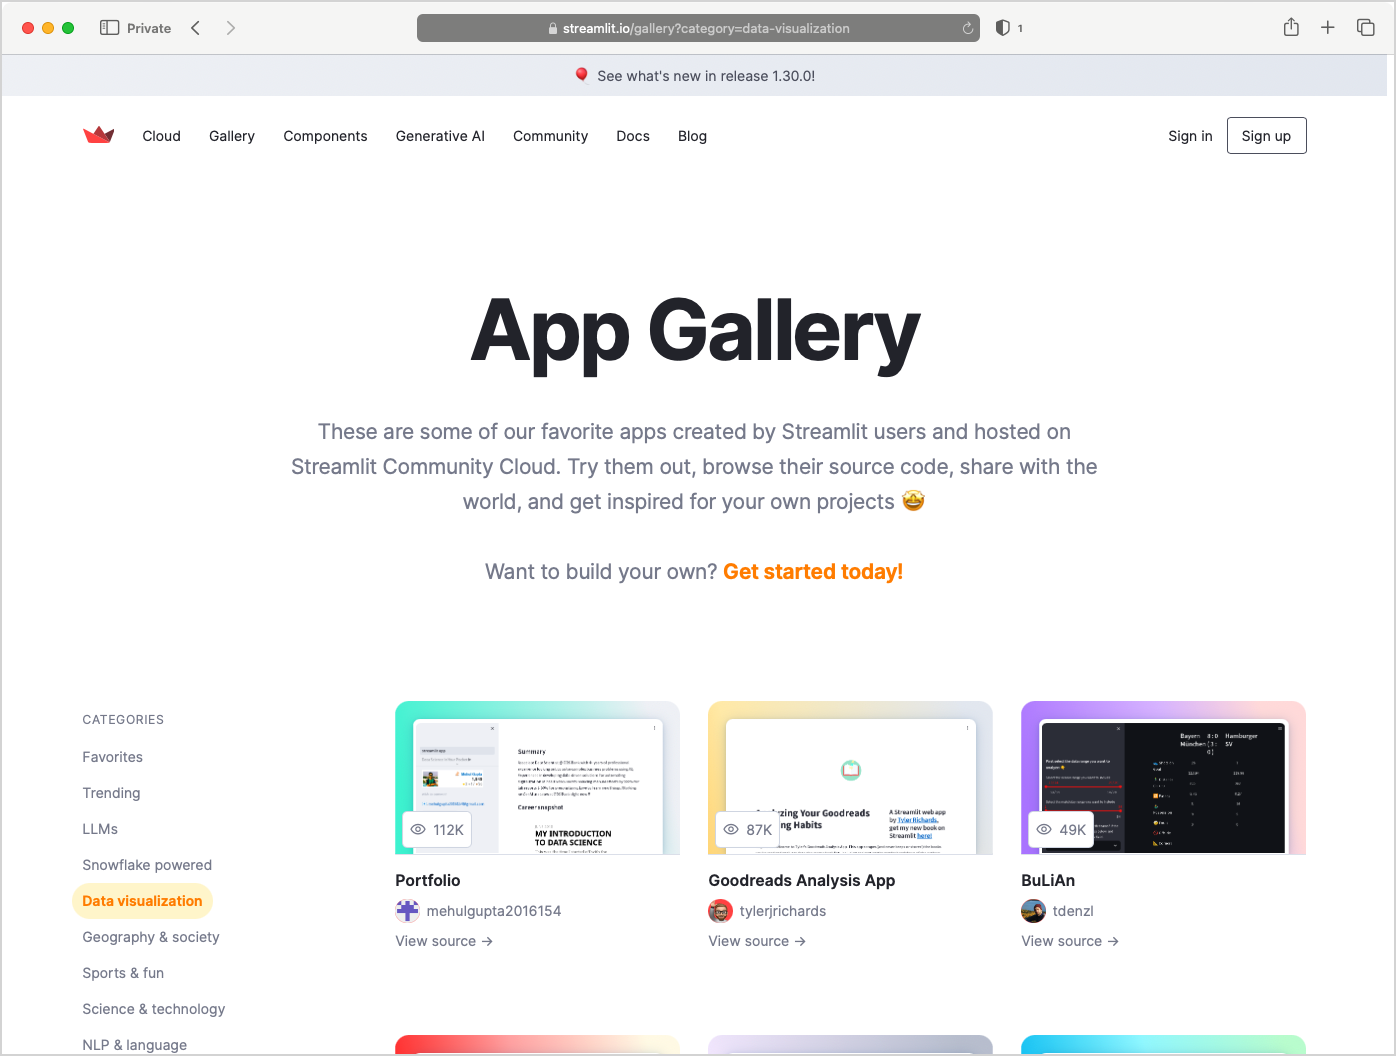
If your app is hosted in a public repository on GitHub, you can deploy it for free to Streamlit’s Community Cloud service. There are a variety of reasons companies offer free hosting for public projects. For one thing, having a collection of open projects helps people learn how to use the underlying framework. The code for every project hosted on Community Cloud is one click away; if you see an app or feature you like, you can see exactly how its developers implemented the project using Streamlit.
You can make an account on Community Cloud using Google, GitHub, or through email-based authentication. If you don’t already have an account, I encourage you to read through the rest of this post before making one. Streamlit asks for more permissions than you probably want to grant, and there’s a way to avoid some of the permissions that isn’t very obvious.
Connecting a GitHub repository
I pushed the code for the Rolling Dice project to a GitHub repository, so it’s ready to deploy to Community Cloud. Make sure your project has a requirements file, so Streamlit will know what packages it needs for deployment. To deploy a public project, go to https://share.streamlit.io.
I already have a Community Cloud account, but I disconnected my GitHub account in order to walk through the process again. Without a connected GitHub account, this is what the share.streamlit.io dashboard looks like:

Notice the caution symbol next to Settings. Streamlit really seems to want access to your GitHub repositories, and if you limit the access in any way you’ll see that symbol.
If you click New app and you haven’t already connected your GitHub account, you’ll see a button labeled Connect to GitHub:
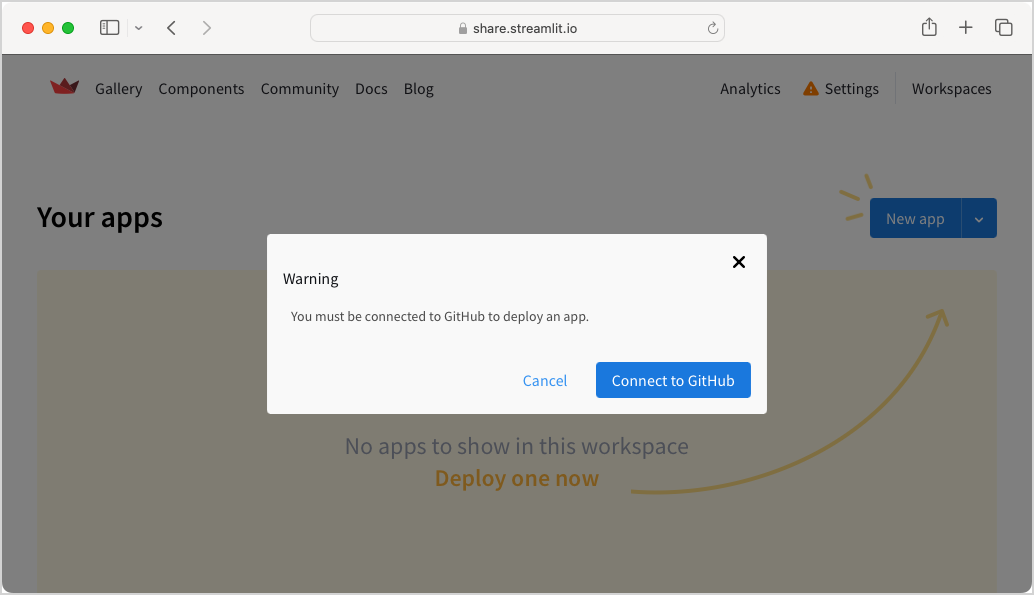
There’s no way to avoid this connection, so click that button.
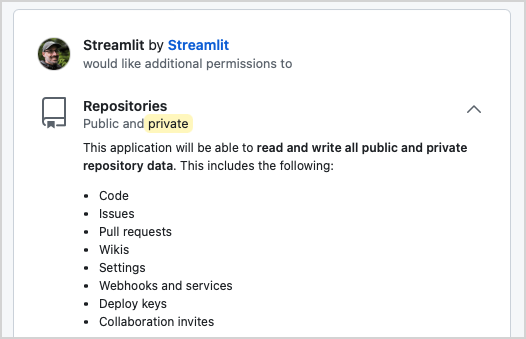
You’ll arrive at a GitHub page where you can authorize Streamlit to access your public repositories:
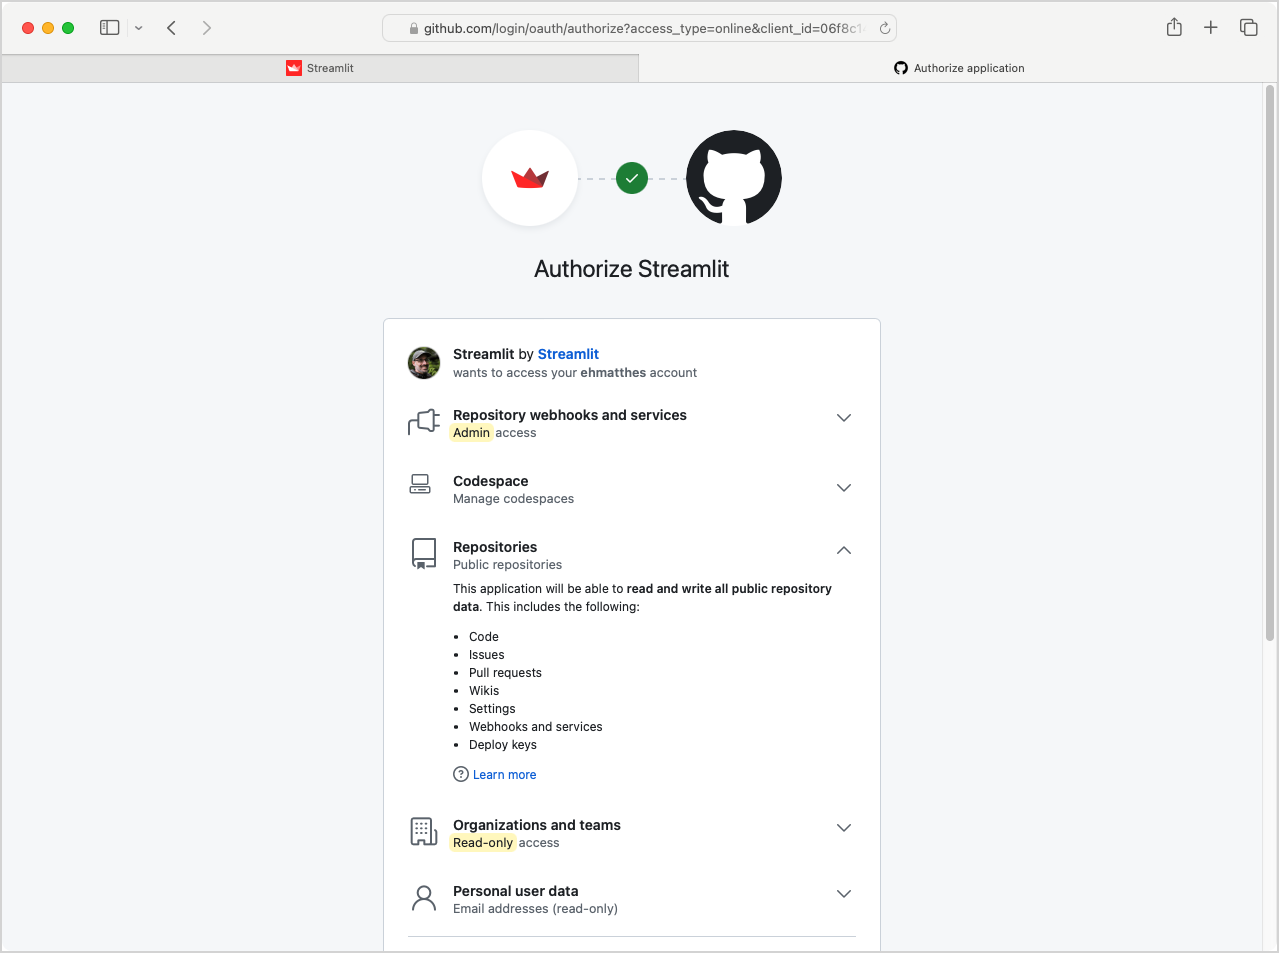
I don’t particularly like the permissions that Streamlit asks for. They want full admin and read/write access to all your public repositories. I think this is because they offer an in-browser editor where you can work on your Streamlit projects. But they don’t give the option to opt in to that specific service; if you want to deploy a public project to Community Cloud, you have to grant all these permissions.
Public repositories are part of the open source supply chain, and asking for full access to all of a user’s repositories seems a little inappropriate in 2024. Streamlit says they don’t want to have to ask for permission more than once, but most developers I know are perfectly fine granting permissions on a per-repo, as-needed basis.
I believe you can grant these permissions, deploy your project, and then revoke permissions. You’ll lose access to some services through Streamlit until you grant permissions again, but your projects appear to continue running.
If you see a request for access to your private repositories as well, you can bypass that request by going directly to the URL https://share.streamlit.io/deploy. I believe with a new account Streamlit tries to get access to private repositories. I bypassed that once, and it doesn’t seem to prompt for private access on subsequent deployments.
Deploying your project
After dealing with permissions, you’ll arrive at a page where you can tell Streamlit which repository you want to deploy from:
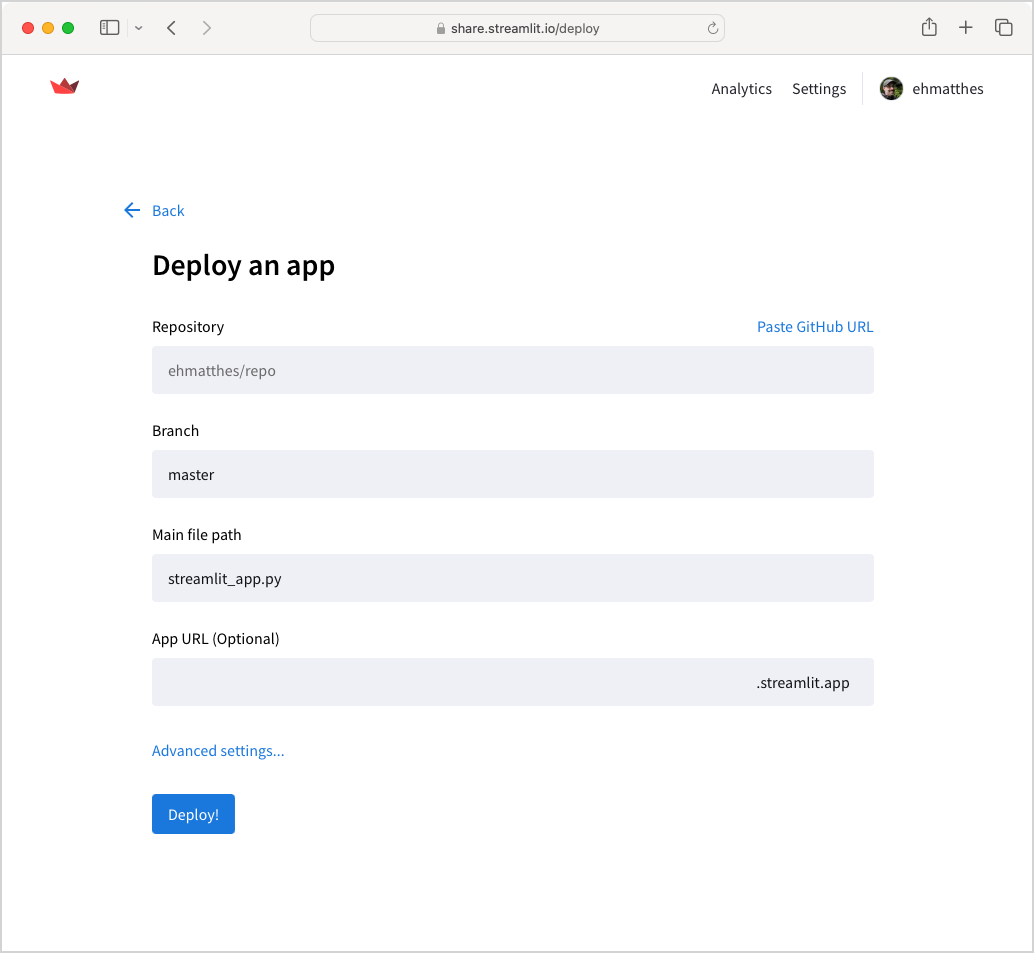
You can fill this page out with your repository’s URL, the name of the branch you want to deploy from, and the name of the .py file that you’ve been calling with streamlit run. Streamlit will generate a unique URL for your project, and you’re free to enter a simpler name that hasn’t already been taken. For this project, I chose sl-roller.streamlit.app.
When you click Deploy, you’ll see a message that “Your app is in the oven.” In a moment, you should see a deployed version of your app that behaves just like the one you’ve been running locally. Here’s what the Rolling Dice demo looks like immediately after deployment:

When you’re logged in to Community Cloud, you’ll see a sidebar that lets you manage your app. You can view the log, see how many people have visited your app, reboot it as needed, and more.
A little more about private repos
Streamlit really seems to want access to our private GitHub repositories. I bypassed the popup that demands access to private repositories as described above, but I still have a caution symbol next to my Settings link. Here’s what I see if I click on Settings:
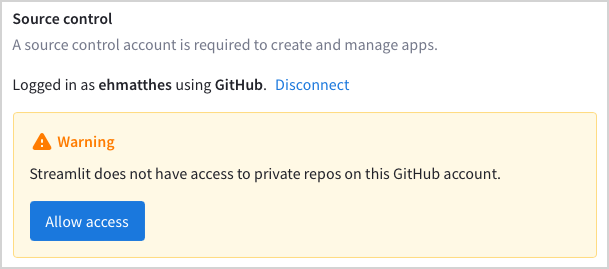
Streamlit’s justification for this warning is that they allow you to deploy one app from a private repository. But if you click Allow access, this is what you see:
For the possibility of deploying from one private repository, Streamlit wants read and write access to all of your private repositories. In an issue on the streamlit repository, staff have suggested that people can make a new GitHub account if they dislike Streamlit’s approach to handling permissions. This is not a very satisfying response, as it shifts all the responsibility for appropriate access onto developers.
I’m only using Community Cloud because it’s possible to bypass the demand for private repository access. If you decide to use it as well, I encourage you to keep that caution symbol next to your Settings link as well.
Pushing changes
When you connect a GitHub repository to a Community Cloud deployment, Streamlit sets a web hook on the repository. Any time you push changes to the branch that the deployment is pulling from, Streamlit gets a notification and automatically updates the deployed project.
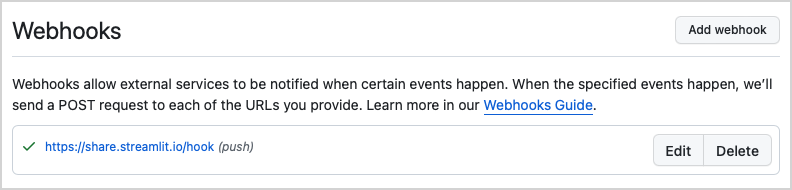
This means when you push updates to your repository’s main branch, or merge changes into the main branch, your deployment will pick up those same changes.1
Conclusions
Streamlit is fairly easy to get started with, and if you’re already familiar with Git and GitHub it’s quite easy to deploy your public projects as well.
Be aware that projects hosted on Community Cloud have about 1GB of resources available, and they rate-limit requests to prevent abuse. I shared a project that got several requests a minute for a while, and the app handled it perfectly fine. I shared that same project to a larger audience, and everyone started getting 429 errors. If you have a project that’s going to see many concurrent users, Community Cloud is probably not an appropriate deployment solution.
I’ll follow this up with a couple more posts about using Streamlit over the next month or two. I’ll share a real-world dashboard I developed, and discuss a variety of issues involved with making performant deployments of your Streamlit apps. If you have questions or observations from your own experiences, please share them!
Resources
You can find the code files from this post in the roller_demo GitHub repository.
I’m using the word “main” loosely here. You can tell Streamlit to watch any branch on your respository. So you could have a
mainbranch, adevbranch, and astreamlit_ccbranch if you want. If you tell Streamlit to deploy from thestreamlit_ccbranch, that’s the only one it will pick up changes from. ↩